Introduction of Outdoor Patio Tiles
Outdoor patio tiles have revolutionized the wy homeowners and designers approach outdoor living spaces. In recent years, these tiles have grown in popularity thanks to their durability, aesthetic appeal, and flexibility in design. From small balconies to expansive backyard retreats, outdoor tiles prvide an ideal foundation for creating a functional and stylish area to relax, entertain, or simply enjoy the open air.
It’s important to understand what makes outdoor patio tiles unique compared to indoor options. These tiles are specificlly engineered to withstand changing weather conditions — rain, snow, direct sunlight, and even freezing temperatures. Unlike indoor tiles, which may crack or fade when exposed to the elements, outdoor tiles are built to last. They come in a wid rnge of materials, including porcelain, natural stone, rubber, composite, and even eco-friendly recycled options.
But outdoor patio tiles are more than just tough. They’re a design statement. With endless textures, finishes, and patterns available, you can replicate the look of natural wood, stone, or even polished concrete — all while enjoying the benefits of an easy-to-clean, slip-resistant surface.
You need to know about outdoor patio tiles, from the basics and benefits to installation techniques, maintenance, common pitfalls, and expert tips. Whether you updating a tired patio or starting from scratch, this comprehensive overview will help you make informed decisions at every step.
Let’s start by defining exactly what we mean by outdoor patio tiles, and why they’re different from ordinary tiles.
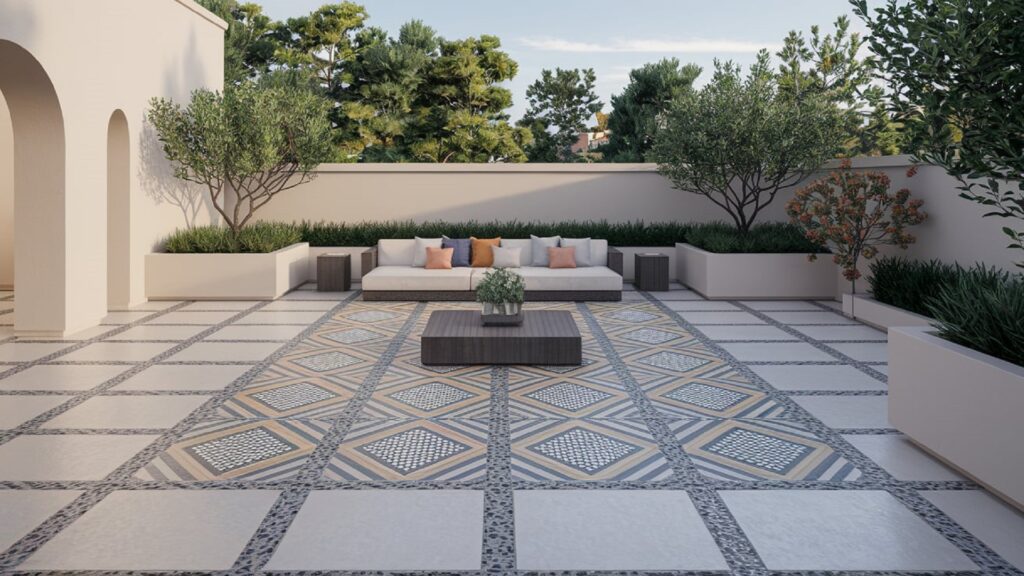
What are Outdoor Patio Tiles?
Outdoor patio tiles are specialized tile products designd for external environmnts such as patios, garden walkways, pool decks, rooftops, terraces, and balconies. Unlike their indoor counterprts, these tiles are manufactured with durability and safety in mind. They are crafted to handle heavy foot traffic, moisture, temperature extremes, and UV exposure without deteriorating or losing their appearance.
Related Post: Patio Tiles
These tiles can be made from a variety of materials. Some of the most popular include:
- Porcelain: Dense, water-resistant, and highly durable. Porcelain tiles are one of the top choices for outdoor use.
- Natural Stone: Includs slate, travertine, granite, and sandstone. Stone tils offer a beautiful, earthy look but may require sealing.
- Concrete: Affordable and tough, concrte tiles can be molded and colored to mimic natural materials.
- Composite and Rubber: These materials are often used in DIY or temporary setups. They’re easy to install and eco-friendly.
- Ceramic (limited use): While some ceramic tiles are rated for outdoor use, they’re generally less durable than porcelain or stone.
One important aspect of outdoor tile is slip resistance. Most outdoor-rated tiles come with a textured or matte finish that provides extra grip, making them safer when wet — a crucial feature for pool areas or regions with frequent rainfall.
Another factor to consider is the PEI (Porcelain Enamel Institute) rating, which measures a tile’s hardness and durability. A rting of PEI 4 or 5 is recommended for outdoor use, especially in high-traffic areas.
So, when we talk about outdoor patio tiles, we’re referring to a category of flooring specifically engineered to handle the challenges of the outdoors — all while delivering design flexibility and lasting value.
Benefits of Outdoor Patio Tiles
When you planning to upgrade your outdoor space, choosing the right surface material is one of the most important decisions. Outdoor patio tiles offer numerous advantages over traditional options like wooden decking or poured concrete. Let’s take a closer look at some of the major benefits:
Visit This Link: Interlocking Deck Tiles
1. Extreme Durability
Outdoor environments can be harsh. Rain, snow, freezing temperatures, and UV rays can wear down surfaces quickly. Outdoor patio tiles, especially porcelain and stone — are designed to resist cracking, fading, and moisture absorption.
They maintain their appearance for years, making them a long-term investment.
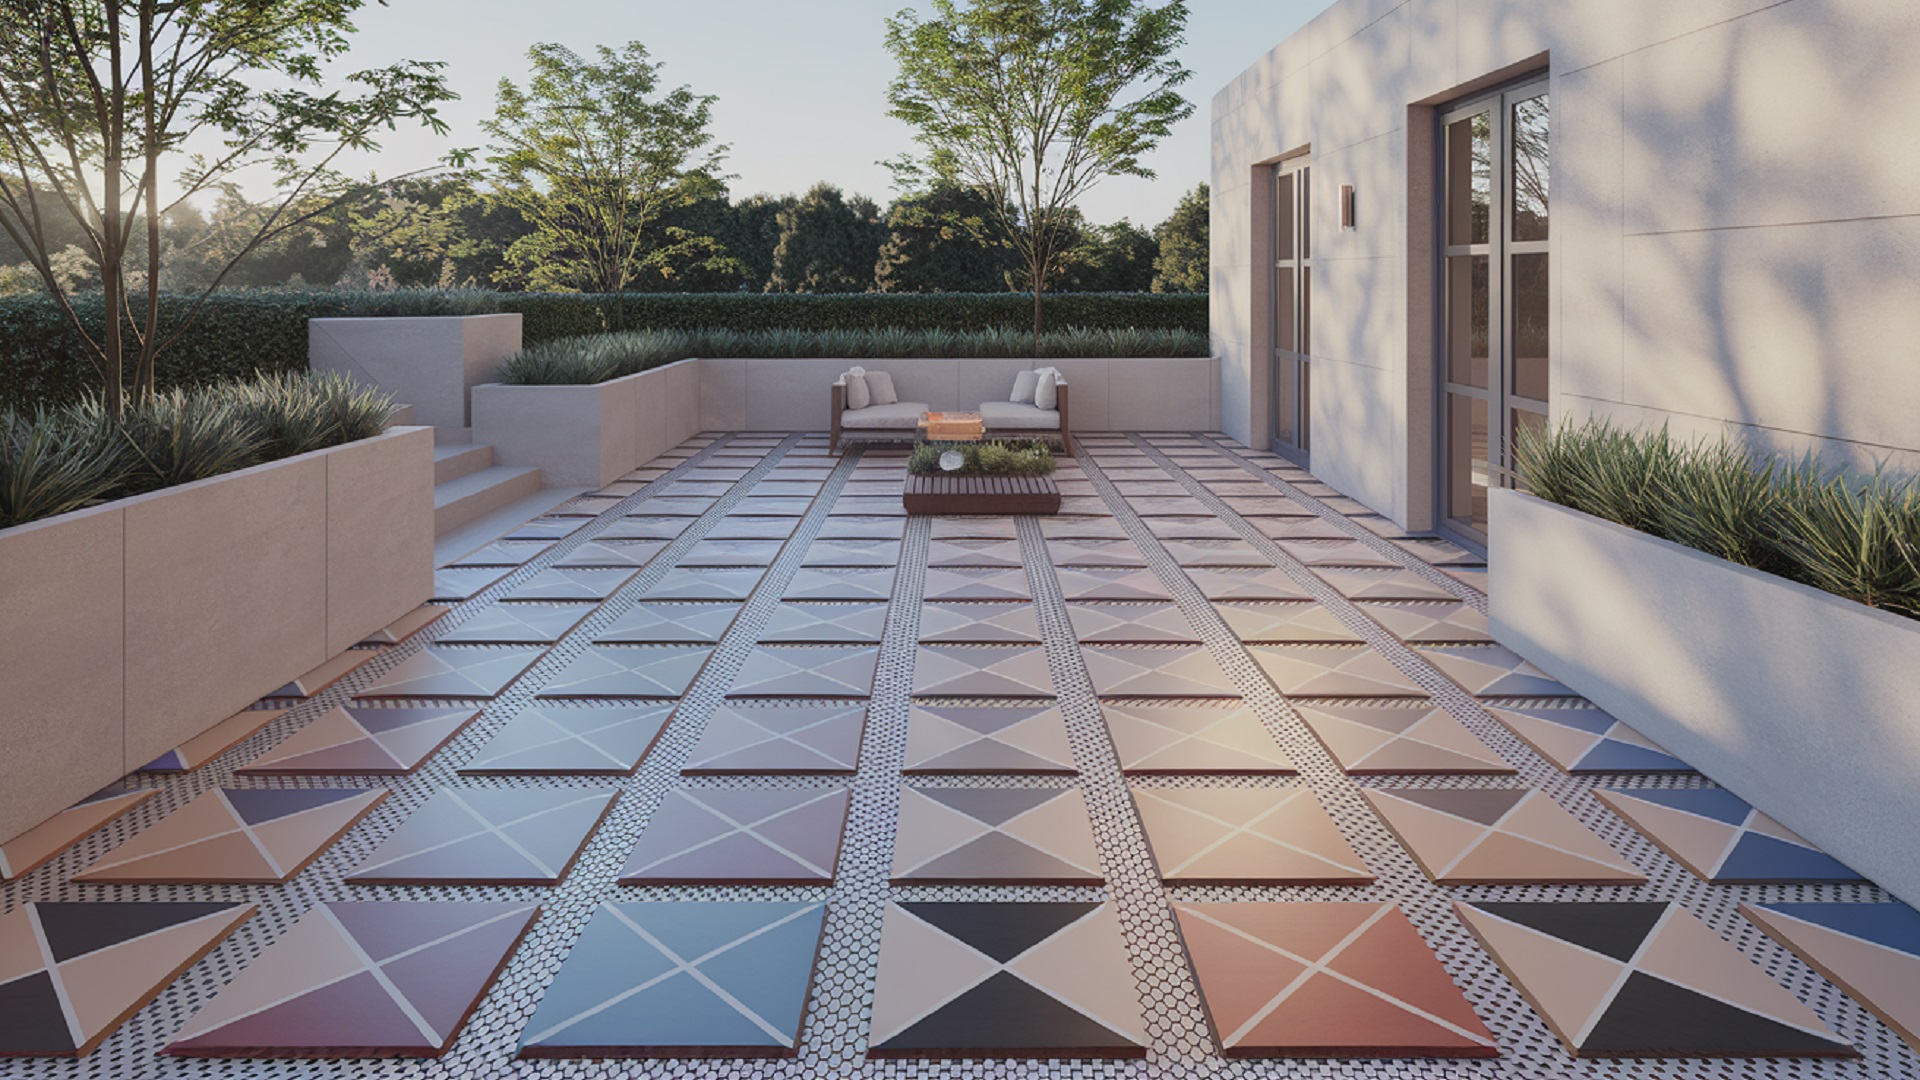
2. Aesthetic Versatility
From sleek modern designs to rustic cobblestone looks, outdoor tiles come in an incredible rnge of finishes and colors. You can match your tiles to your landscaping, furniture, or even the architecture of your home.
Manufacturers now produce tile collections that mimic high-end materials like wood or marble — with none of the maintenance hassles.
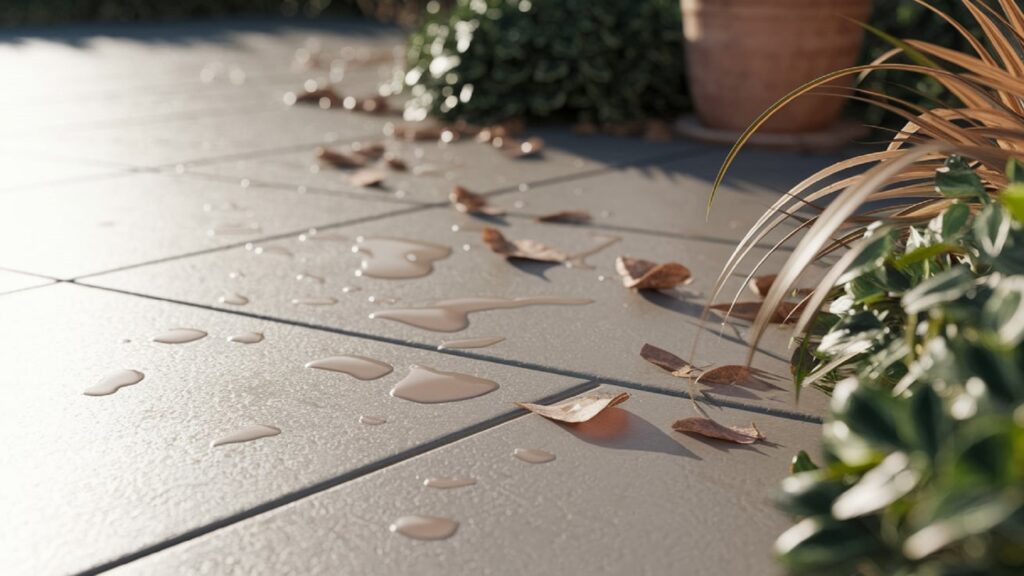
3. Easy Maintenance
Cleaning outdoor patio tiles is simple. Most only require occasional sweeping and occasional pressure washing. Stains can usually be removed with mild detergent and water.
Unlike wood, there’s no need for staining or sealing (unless you’re using natural stone).
4. Safety Features
Many outdoor patio tiles come with anti-slip surfaces, which help reduce accidents — especially around pools, spas, or rainy areas. Look for tiles with high slip-resistance ratings or textured surfaces.
5. Increased Property Value
A well-designed outdoor patio enhances the overall appeal of your property. Real estate experts often highlight outdoor spaces as a top-selling feature, and high-quality tiles can give your home a premium feel that attracts buyers.
6. Eco-Friendly Options
More tile manufacturers are offring sustainable outdoor patio tiles made from recycled or low-impact materials. These options can help reduce your environmental footprint while still delivering outstanding performance and style.
7. Flexible Installation
Tiles can be laid over existing concrete slabs, deck surfaces, or gravel beds. Some modular tile systems even allow for temporary setups, making them perfect for renters or seasonal layouts.
Therefore, outdoor tiles are suitable for both permanent and semi-permanent installations.
This list is just the beginning. The next section will walk you through exctly how to use outdoor patio tiles effectively — including tips, tools, and layout suggestions.
How to Use Outdoor Patio Tiles Effectively
Using outdoor patio tiles properly requires more than simply laying them down on the ground. To ensre long-lasting beauty and function, you need the right planning, materials, and technique. Whether yu’re working on a DIY weekend project or hiring a professional contractor, the following steps will help you achieve optimal results.
Related Post: Patio Flooring
1. Plan Your Layout
Before purchasing any tiles, sketch out your patio design. Think abut size, shape, tile orientation (diagonal, grid, staggered), and how it will connect with other landscape elments like your garden, fire pit, pool, or furniture.
Tip: Use chalk lines or string to mark the dimensions of your patio area on the ground to visualize the final look.
2. Choose the Right Tile Material
As mentioned earlier, tile selection is crucial. Here’s a quick summary of materials best suited for various conditions:
- Porcelain: Excellent all-around performance in any climate.
- Travertine or Slate: Great for a natural look, but requires sealing.
- Rubber or Composite: Ideal for rooftops or lightweight installations.
- Textured Ceramic: Use only in covered patios or mild climates.
Make sure the tiles are rated for outdoor use. Check for frost resistance, slip resistance (look for R ratings or DCOF ≥ 0.42), and moisture absorption properties.
3. Prepare the Surface
A stable base is the foundation of a great patio. Depending on your location and tile type, you can use:
- A concrete slab (most common and stable)
- A gravel bed topped with sand (ideal for drainage)
- A decking base (requires lighter tiles or pedestal systems)
Ensure the surface is flat, properly sloped (for drainage), and free of debris or movement.
4. Use Proper Adhesives and Grout
- For concrete bases, use outdoor-grade thinset mortar.
- For gravel beds, use interlocking tiles or dry-laid pavers.
- Choose grout designed for exterior conditions, which resists mold and cracking.
Pro tip: Use spacers to maintain consistent grout lines and avoid future shifting.
5. Cut and Fit Tiles Accurately
Use a wet saw or angle grinder with a diamond blade for clean cuts, especially with porcelain or stone. Make sure edges are smooth and align with your design.
Don’t forget expansion joints — outdoor tiles need room to move with temperature changes.
6. Seal (When Necessary)
Some tile types — especially natural stone — are pors and need sealing to protect against water, oil, and stains.
- Use a breathable, penetrating sealant.
- Reseal every 1–2 years for maximum protection.
Note: Porcelain generally doesn’t require sealing.
7. Maintain Regularly
Once installed, keep your outdoor patio tiles in top condition by:
- Sweeping debris weekly
- Pressure washing seasonally
- Spot-cleaning stains with mild detergent
- Inspecting for grout cracks or lifting tiles
Internal Tip
If you’re design a multi-level outdoor space, check out our landscape tile layout ideas to explore patterns and combinations that work well across steps, decks, and pool edges.
External Resource
Need a complete step-by-step installation tutorial? This Family Handyman guide walks you through professional installation with tools and tips.
Common Mistakes People Make
Even with the best materials, incorrect installation or poor planning can rsult in wasted time and money. Here are some of the mst common mistakes people make when installing outdoor patio tiles — and how to avoid them.
Related Post: Outdoor Pavers
1. Choosing the Wrong Tiles
Indoor tiles or glossy finishes can become dangerously slippery when wet. Thy may also crack in freezing temperatures. Always select outdoor-rated tiles with slip resistance and frost-proof properties.
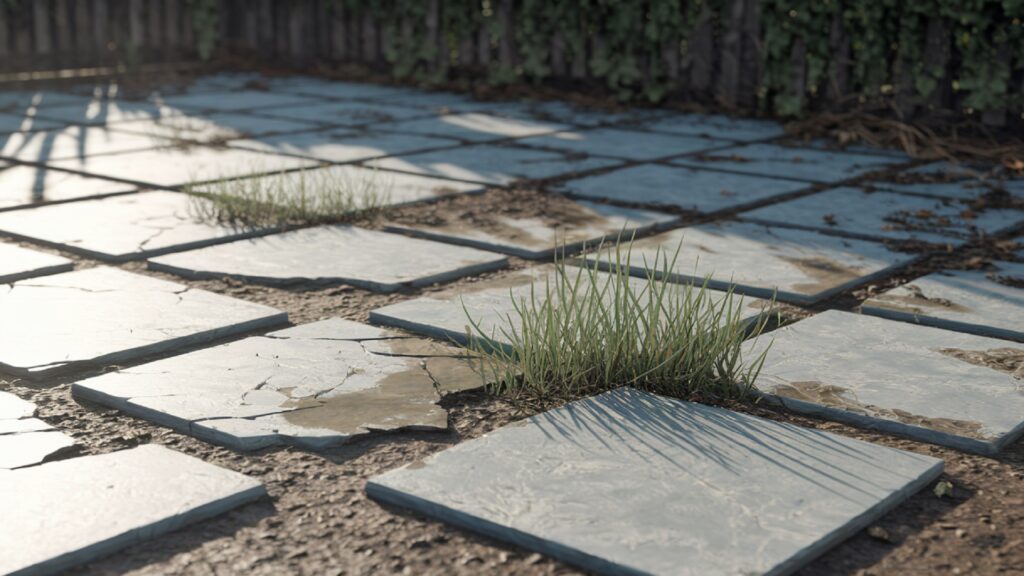
2. Skipping Surface Prep
Tiles installed on an uneven or unstble base will shift or crck over time. A level and compacted foundation is essential for long-term durbility.
3. Ignoring Drainage
Flat patios without proper slope (minimum 1/8 inch per foot) can pool water, which damags grout and leads to mold growth. Always account for water runoff.
4. Using Indoor Adhesives or Grout
Interior-grade adhesives break down under the sun and rain. Always use weatherproof, outdoor-rated products — especially for areas with freze/thaw cycls.
5. Forgetting Expansion Gaps
Without expansion joints or edge gaps, tils may buckle or crack as temperaturs change. Leave at least 1/8 inch between tiles and walls.
6. Neglecting Sealing
Unsealed natural stone can stain easily or absorb moisture, leading to algae or mold. Proper sealing helps protect both appearance and structure.
Avoiding these issues from the start ensures your outdoor patio tiles will look great and last for years to come.
Bonus: Advanced Design Ideas & Layout Tips
Now that you’ve covered the basics, let’s take your tile projct to the next level. Belw are some high-end design ideas and layout suggestions that cn elevate your outdoor patio from functional to fantastic.
1. Mix & Match Tile Styles
Who says you have to stick to one type of tile? Consider combining:
- Natural stone borders with porcelain center tiles
- Geometric patterned tiles mixed with neutral tones
- Different tile sizes (e.g., 12×12” with 6×24”) for dynamic layouts
Mixing tile styles adds depth and visual interst to large patios.
2. Use Color to Define Zones
Break up your outdoor space by using differnt tile colors or textures to define zones:
- Dining area
- Lounge area
- Outdoor kitchen or BBQ
- Walkways or garden paths
This method gives structure and intention to your design, espcially in open-concept yards.
3. Add Borders or Inlays
For a custm look, incorporate decorative borders or inlay pattrns using contrsting tiles. This works especially well around:
- Fire pits
- Outdoor furniture groupings
- Water features
Borders also help guide traffic flow and add a high-end look to basic tile installations.
4. Try Diagonal or Herringbone Layouts
While square or brick patterns are common, you can make a statement with:
- Diagonal (diamond) layouts — add movement and draw the eye outwrd
- Herringbone — ideal for narrow patios or walkways
- Basketweave — a classic, textured pattrn for traditionl spaces
Layout choice can dramaticlly change the feel of your space, even with the same tiles.
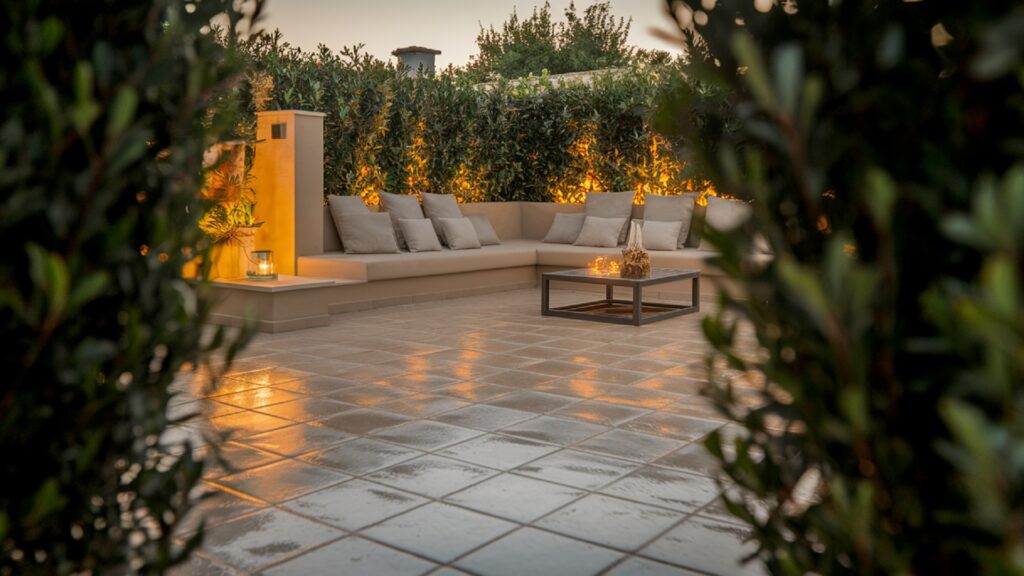
5. Integrate Lighting Into Tile Design
Modern patios often feature LED lighting strips or solar pavers embedded between or alongside tiles. This adds both ambiance and functionality after sunset.
Make sure the electrical work is weather-rated and safe for outdoor use.
6. Use Raised Deck Tile Systems
If your surface is uneven, you’re working on a roftop, or you don’t want permannt changes, consider using deck tile systems with adjustable pedestls. These “floating tiles” are
- Easy to remove and replace
- Ideal for rental properties or rooftops
- Perfect for creating drainage undrneath
Bonus: These systems allow for electrical or irrigation lines to be run underneath the tiles!
Outdoor Patio Tiles Quick Reference Table
| Feature | Best Option | Why It Matters |
|---|---|---|
| Durability | Porcelain | Water, UV, and frost resistant |
| Aesthetic | Natural Stone | Unique textures and colors |
| DIY-Friendly | Interlocking Rubber Tiles | No adhesive required |
| Luxury Look | Large Format Tiles | Fewer grout lines, seamless appearance |
| Eco-Friendly | Recycled Composite Tiles | Low-impact and sustainable |
| Low Maintenance | Sealed Porcelain | Easy to clean, long-lasting |
FAQs About Outdoor Patio Tiles
Let’s answer some of the most common questions homeowners ask about outdoor patio tiles:
What is the best tile material for outdoor patios?
Porcelain is often considered the best all-arund material for outdoor use. It’s dense, frost-resistant, slip-resistnt, and available in a wide rnge of finishes. Natural stone (like slate or travertine) is also popular for its unique appearance, but requires sealing and maintenance.
Can I install outdoor patio tiles myslf, or should I hire a pro?
If you have basic DIY skills and the right tools, you can install certain type of tiles (especially interlocking or dry-laid systems) yourself. For permanent installations using mortar and grout, hiring a professional ensures proper surface prep, drainage, and alignment — all critical for longevity.
How long do outdoor patio tiles last?
With proper installation and care, outdoor patio tiles can last 15–25 years or mre. Porcelain tiles often outlast other materials, while natural stone’s longevity depends on maintnance and climate.
Do outdoor patio tiles get hot in the sun?
Yes, some tile materials — especially darker shades or stone — can heat up under direct sun. To reduce surface temperature, choose lighter-colored tiles or opt for tils made with thermal-resistant technology.
How much does it cost to install outdoor patio tiles?
The cost can vary widely based on tile material, surface prep, and labor. On averge:
- DIY installations: $5–$10 per square foot
- Professional installations: $12–$30+ per square foot
Natural stone and porcelain are on the higher end, while rubbr and compsite are more budget-friendly.
Author Remarks
Outdoor patio tiles are one of the most rewarding decisions you can mke for your outdoor space. Whether yu’ building a new patio, refrshing an old one, or dsigning a luxury backyard retreat, tiles offer unmatched versatility, durability, and aesthetic value.
They allow you to blend practicality with creativity, delivering slip-resistant, low-maintenance surfaces that withstand the harshest weather conditions. With the right planning, materials, and care, your tiled patio can last for decades while continuing to look as stunning as the day it was installed.
Choosing the right tile, preparing the surface properly, using correct adhesives, and staying on top of maintenance are all key factors in mximizing your invstment.
So if you’re ready to transorm your outdoor living space, outdoor patio tiles might just be the perfect foundation for your dream design.
4 Responses
[…] Related Post: Outdoor Patio Tiles […]
[…] Visit This Link: Outdoor Patio Tiles […]
[…] Visit This Link: Outdoor Patio Tiles […]
[…] Also, Visit This Post: Outdoor Patio Tiles […]