Patio Tiles offer a powerful and elegant way to upgrade any outdoor living space. They allow you to redefine areas like backyards, balconies, or gardens wth ease. The right patio tiles can significantly boost your home’s curb appeal, create a safe surface for family and guests, and even add to your property value.
When choosing the perfect patio tiles, the process may feel overwhelming. There are countless materials—natural stone, porcelain, concrete, vinyl decking—and each coms with its own pros and cons. Beyond the material, you’ll want to consider color schemes, textures, and layout patterns. It’s essntial to evaluate how your climate, usage patterns, and drainage needs will affect long-term performance. That’s why a thorough and well-balanced approach is vital.
You go thrugh every facet of using Patio Tiles effectively. You’ll discover what they are, how they benefit your outdoor space, and a detailed, step-by-step process for installing them correctly. We’ll also highlight common mistakes to avoid, offer real-life examples, and answer key questions to empower you with the right information.
How invsting in Patio Tiles can transform your outdoor area into a lasting, stylish sanctuary—whether you’re hosting barbecues, relaxing on weekends, or just enjoying a quiet evening outdoors.
Introduction of Patio Tiles
What are Patio Tiles?
At its core, patio tiles are specialized outdoor flooring solutions designed to withstand the environmental challenges of external spaces. These tiles serve both a functional and aesthetic purpose—offering a durable surface while enhancing the overall design of your patio, garden, balcony, or poolside area.
Patio tiles are made to be water-resistant, slip-resistant, and often UV-resistant, meaning they don’t fade or degrade quickly when exposed to the sun or harsh weather. They are available in a wide rnge of materials, including porcelain, ceramic, natural stone (like slate, travertine, and granite), rubber, concrete, and even wood-plastic composites. Each type is tailored to different environmental needs, design preferences, and budgets.
Let’s break that down:
Porcelain patio tiles are a top choice for homeowners who want low maintenance and high durability. These are non-porous, frost-resistant, and ideal for wet climates.
Natural stone tiles offer unmatched beauty and uniqueness, but thy often require sealing and more upkeep.
Concrete tiles are affordable and customizable, but can crack in extreme freeze-thaw conditions.
Rubber or composite tiles are perfect for DIY installation and areas where slip-resistance is critical, such as around pools.
What makes patio tiles especially popular is their adaptability. You can use them to cover an old, cracked concrete slab, create new outdoor zones from scratch, or simply refresh the look of an outdated space. Many manufacturers now offer interlocking or floating tile systems, which don’t even require adhesives or grout, making them perfect for renters or temporary upgrades.
Another key advantage of using patio tiles over other surfacing materials (like poured concrete or gravel) is the precision they allow in design. With tile, you can create stunning patterns—herringbone, basket weave, grid, and staggered layouts. You can also blend different textures or colors to define separate outdoor “rooms,” like a lounge area, grill station, or garden path.
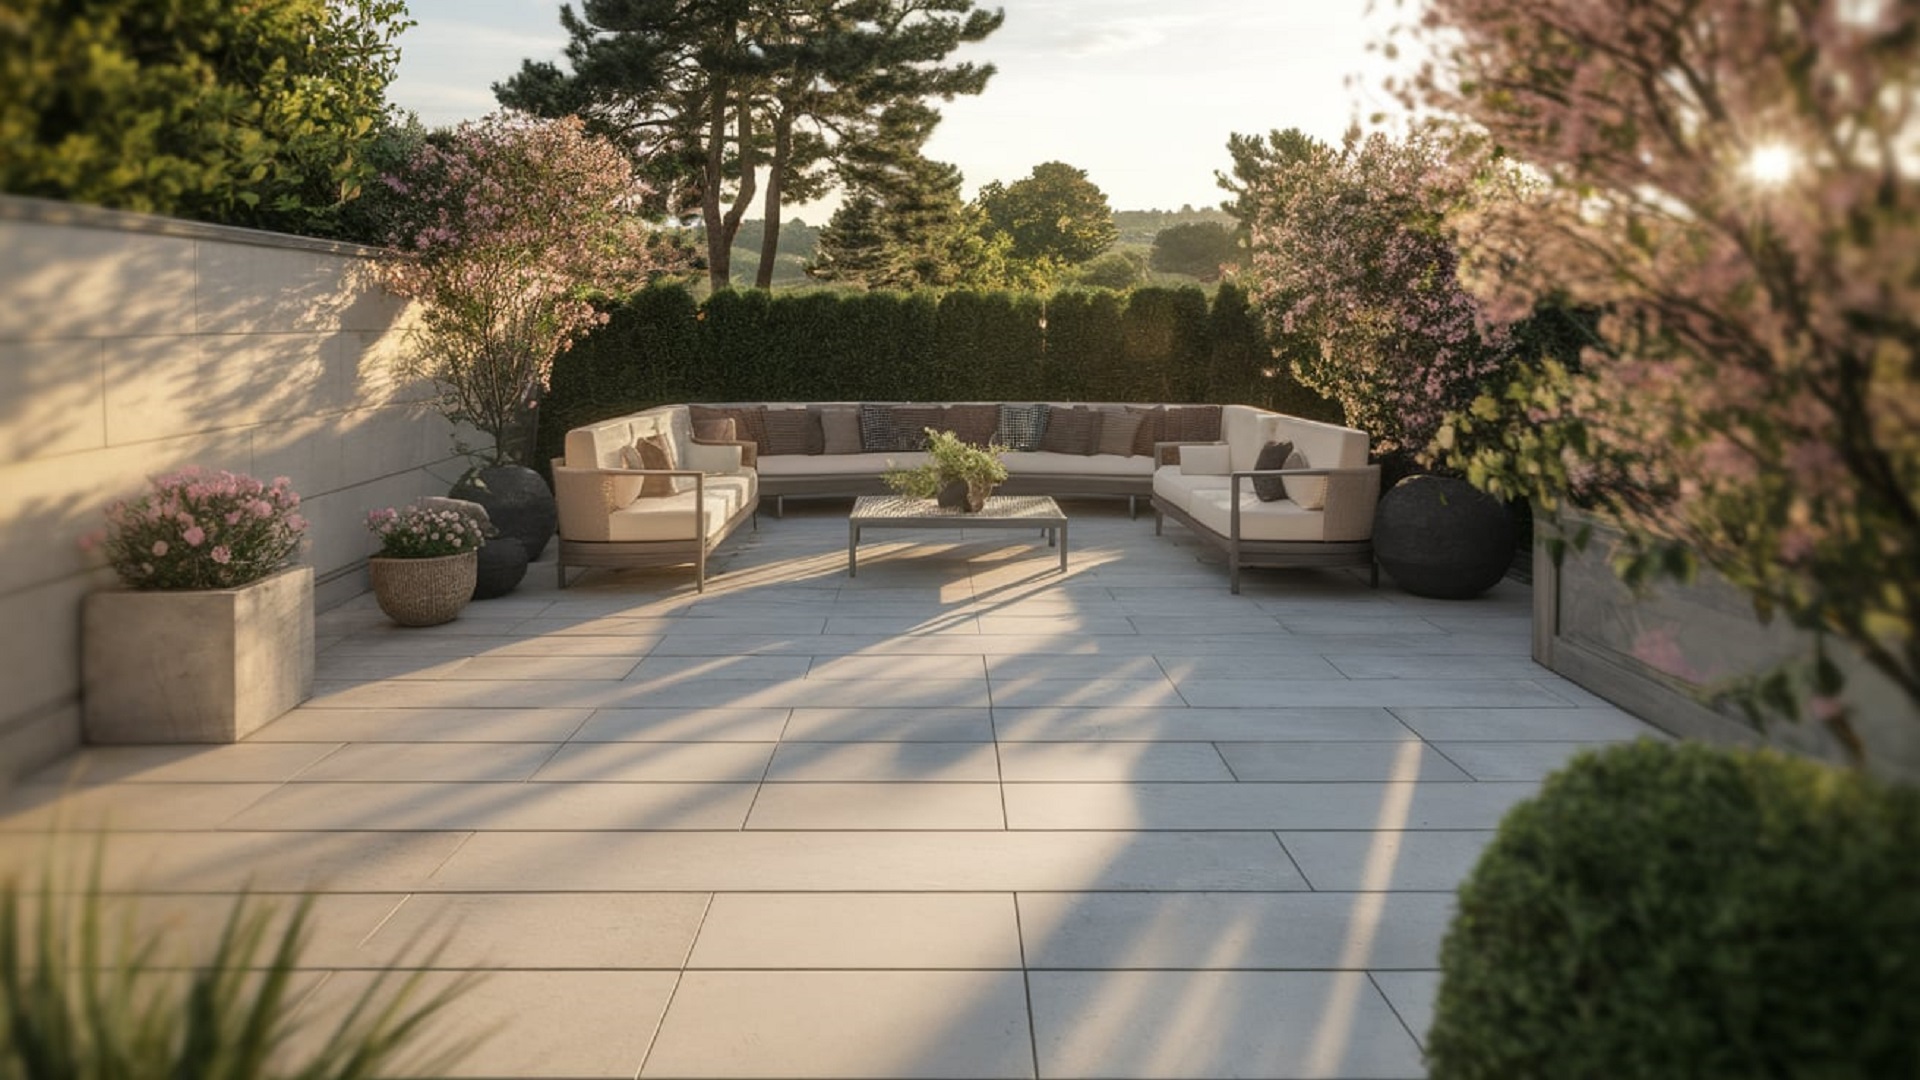
Patio tiles
A long-lasting, stylish, and practical solution for outdoor flooring. They are built to endure the elements, support heavy furniture, and resist slips and stains, making them ideal for homeowners who want both function and beauty in their outdoor spaces. Whether you want to entertain guests, enjoy nature, or increase the value of your property, patio tiles provide a solid and visually appealing foundation to do so.
Benefits of Patio Tiles
Patio tiles are more than just a visual upgrade—they brng a wide range of benefits that make them a standout option for homeowners looking to improve their outdoor living spaces. From increased durability to design versatility, patio tiles deliver both functional value and aesthetic charm.
Let’s explore the many benefits of using patio tiles in more detail.
1. Durability That Withstands the Elements
Outdoor spaces face extreme conditions—rain, snow, UV rays, and heavy foot traffic. Fortunately, most patio tiles are engineered to handle this. Porcelain tiles, for example, are fired at high temperatures, making them highly resistant to water absorption, cracking, or fading. Similarly, natural stone options like slate or granite can last for decades if properly sealed and maintained.
Tip: For climates with frequent freeze-thaw cycles, look for frost-resistant tiles labeled for outdoor use.
2. Design Flexibility and Customization
One of the most exciting aspects of patio tiles is the sheer variety of styls available. You can choose from dozens of:
Sizes and shapes (square, rectangular, hexagonal, irregular)
Colors and patterns (earth tones, neutrals, bold colrs, mosaic)
This flexibility allows homeowners to match the exterior of their home, blend with landscaping, or create distinct zones for different activities.
Want a Mediterranean vibe? Try terracotta tiles. Prefer a minimalist, modern look? Opt for large-format concrete-style porcelain tiles.
3. Increased Property Value and Curb Appeal
In addition to comfort and beauty, investing in high-quality patio tiles can increase your home’s market value. A well-designed patio with tiled flooring often stands out in real estate listings, especially in competitive housing markets. Not only does it look more polished, but it also signals to potntial buyers that the space is well cared for.
According to real estate experts, outdoor living upgrades can offer a return on investment (ROI) of 80% or more, depending on the location and quality of the installation.
4. Low Maintenance and Easy Cleaning
Cleaning a tiled patio is much easier than managing other surfaces like gravel, wood decking, or bare soil. With the right type of tile (such as glazed porcelain or sealed stone), most messes can be cleaned with jst water and a mild soap.
Here’s what you won’t need:
No power-washing every weekend
No weed removal between pavers
No repainting or resealing every year (unless using natural stone)
Simply sweep regularly and wash off dirt to keep your patio tiles looking new for years.
5. Slip-Resistance and Safety Features
When selecting patio tiles, especially for areas near pools or where children and seniors may walk, safety is crucial. Fortunately, many outdoor tile options cme with textured surfaces designed for slip resistance, even when wet.
Some tiles are even certified with a slip-resistance rating (R-ratings in Europe, or COF—coefficient of friction—in the U.S.).
Look for tiles labeled “anti-slip” or with textured finishes like “grip,” “structured,” or “tumbled” for added safety.
6. Eco-Friendly and Sustainable Options
Modern patio tiles can also appeal to eco-conscious homeowners. Many manufacturers now offer:
Recycled materials
Energy-efficient production methods
Locally sourced stone or clay
Tiles that help reflect heat and reduce your home’s energy usage
Choosing sustainable patio tiles can reduce your environmental footprint while still delivering on style and durability.
7. Easy Repairs and Tile Replacement
Unlike poured concrete or asphalt, if a tile becomes damaged, stained, or loose, yu don’t need to redo the entire surface. Just replace the individual tile. This makes patio tiles a more cost-effective solution in the long term.
8. Versatility in Installation
Patio tiles can be installed over various surfaces, including:
This makes them suitable for bth permanent and semi-permanent installations, such as rental homes or seasonal spaces.
9. Temperature and Comfort Control
Some tile materials, such as travertine or unglazed porcelain, remain cool underfoot even in direct sunlight. This can be a huge advantage in hot climates, making your patio more comfortable during the summer mnths.
For shaded areas or cold climates, you can even combine tiles with radiant heating mats beneath the surface for cozy, heated outdoor floors.
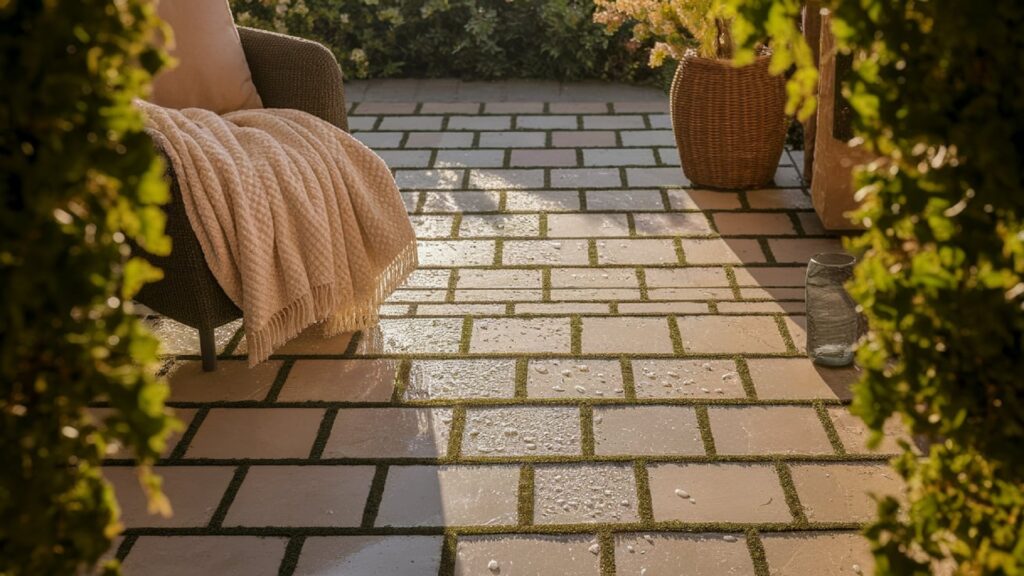
Benefits of Patio Tiles
How to Use Patio Tiles Effectively
Using patio tiles effectively involves more than just choosing a tile that looks good. The key to a long-lasting and beautiful patio lies in thoughtful planning, proper installation, and ongoing care. Whether you’re a DIY enthusiast or hiring professionals, knowing what to expect at every stage ensures the success of your project.
Let’s walk through how to use patio tiles effectively, from selecting materials to maintaining your finished outdoor space.
Step 1: Assess Your Space and Needs
Before purchasing any tiles, take time to evaluate your outdoor area:
Is the surface flat or sloped?
Will the area experience heavy foot traffic or furniture movement?
Does it receive full sun, partial shade, or rain exposure?
Do you live in a freeze-thaw climate zone?
Understanding these factors will help you choose the right material and installation method. For instance, in rainy areas, you’ll want porcelain tiles with high slip resistance, while in dry, sunny climtes, travertine might be a great option.
For help with slope and drainage planning, check out The Spruce’s guide to patio drainage.
Step 2: Choose the Right Type of Patio Tiles
When selecting your patio tiles, prioritize function, safety, and style. Here’s a quick comparison of common tile materials:
Material
Pros
Cons
Porcelain
Waterproof, durable, low maintenance
Can be slippery if not textured
Natural Stone
Unique appearance, long-lasting
Higher cost, requires sealing
Concrete
Inexpensive, modern aesthetic
Can stain or crack
Rubber/Composite
Easy to install, soft underfoot
May fade in UV light
Ceramic
Budget-friendly, wide design range
Less durable, not ideal for freezing climates
Always confirm the tile is rated for outdoor use and check its slip resistance—look for a Coefficient of Friction (COF) of at least 0.60 for wet areas.
Step 3: Plan the Layout and Design
The layout and pattern of your tiles can dramatically affect the final look of your patio. Here are some popular patterns to consider:
Straight lay: Clean, modern, and simple.
Diagonal lay: Visually expands small spaces.
Herringbone: Classic pattern with high visual interest.
Running bond (brick): Good for rustic or traditional looks.
Modular patterns: Mix multiple tile sizes for a custom look.
You can also use tile colors to define zones—for example, a darker tile for the dining space and lighter tones for lounging.
For more layout ideas and patio styles, check out our Outdoor Design Inspiration.
Step 4: Prepare the Surface
Surface preparation is critical to avoid shifting, cracking, or drainage problems. Depending on your surface, you’ll need different prep:
Existing concrete: Clean thoroughly and repair cracks. Use a bonding agent or tile adhesive.
Soil or grass: Excavate the area. Lay compacted gravel and sand or a concrete slab.
Wooden decks: Use floating tile systems or deck tiles that interlock without adhesive.
Make sure the surface is level and drains away from your house. Standing water can damage tiles and the foundation.
Step 5: Install the Patio Tiles
There are three common installation methods:
1. Thinset Mortar Method
Ideal for concrete or masonry surfaces.
Apply mortar with a notched trowel.
Lay tiles carefully, using spacers to ensure uniform gaps.
Allow to cure for 24–48 hours, then grout and seal (if required).
2. Floating/Interlocking Tile Systems
Great for renters or temporary installations.
No adhesives needed.
Simply snap or fit tiles into place over any level surfce.
Tiles rest on adjustable pedestals that allow water drainage underneath.
Step 6: Grouting and Sealing
After installation, allow the mortar or adhesive to set (usually 24 hours) before grouting the joints. Use outdoor-grade grout that is resistant to moisture and UV exposure.
For porous tiles like natural stone or unglazed porcelain, sealing is essential. Apply a high-quality penetrating sealer to protect against stains, mildew, and weather damage.
Step 7: Regular Maintenance Tips
Proper maintenance keeps your patio tiles looking great year after year:
Sweep regularly to remove debris and prevent scrtching.
Rinse with a hose or mild detergent as needed.
Reseal natural stone tiles annually.
Check for shifting or cracked tiles, especially after harsh weathr.
Clean grout lines with a scrub brush and vinegar or a grut cleanr.
Pro tip: Avoid pressure washers on soft stone tiles—they can cause surface erosion.
Bonus: Combining Patio Tiles with Other Materials
To elevate your design, consider combining patio tiles with:
Outdoor rugs or furniture that complemnt your tile tones
These additions can create a cohesive, layered outdoor space that feels like an extension of your interior.
Common Mistakes People Make When Installing Patio Tiles
Even with the best intentions and beautiful materials, mistakes during the selection, planning, or installation of patio tiles can lead to expensive problems dwn the road. Fortunately, most of these mistakes are avoidable with a little foresight and preparation.
Here are the most common errors people make when working with patio tiles—and how to avoid them.
1. Using Indoor Tiles Outdoors
This is one of the biggest and most costly mistakes. Many people see a beautiful tile at a hardware store and assume it will work outdoors—only to find it cracking, fading, or becoming dangerously slippery when wet.
Tip: Always verify that the tile is rated for exterior use. Outdoor patio tiles are specifically engineered for durability, moisture resistance, and grip.
2. Poor Surface Preparation
A smooth, level, and properly compacted surface is essential. Skipping this step often leads to:
Cracked tiles
Uneven surfaces
Water pooling or improper drainage
Loose or wobbly tiles
Before laying any tile, make sure the sub-base is solid, clean, and allows water to drain away from your home.
3. Ignoring Drainage
Water is the enemy of long-term patio performance. Withut proper slope or drainage systems, rainwater can pool on the surface or seep beneath tiles, loosening mortar and causing mold or frost damage.
Rule of thumb: Patios should slope away from the house at a rate of at least 1/4 inch per foot to ensure proper runoff.
4. Using the Wrong Adhesives or Grout
Not all adhesives or grouts are made for outdoor use. Indor formulas can soften in the rain, lose adhesion in freeze-thaw cycles, or discolor in the sun.
Solution: Always use materials clearly labeled for exterior use, and follow manufacturer instructions regarding temperature and curing times.
5. Skipping Sealing
Natural stone tiles like travertine, slate, or limestone are porous and must be sealed. Failing to seal them will result in:
Stains from dirt, oil, or food
Water penetration leading to cracking
Fading and discoloration
Some tiles also need periodic resealing every 1–2 years to maintain protection.
6. Forgetting to Check the Slip Resistance
Smooth, glossy tiles can become dangerously slippry when wet—especially around pools or shaded areas that stay damp. Always chose tiles with a high slip resistance rating for outdoor spaces.
Look for textures like “grip,” “structured,” or “tumbled,” and avoid polished finishes.
Many DIYers install tiles too tightly together, not accounting for natural expansion and contraction due to temperature changes. This can cause buckling or cracked tiles over time.
Tip: Always leave adequate spacing between tiles, especially with rigid systems or large-format tiles.
8. Not Accounting for Furniture or Heavy Loads
Heavy outdoor furniture, grills, or fire pits can put prssure on tiles—especially if the sub-base isn’t properly compacted or reinforced. Cracked or shifting tiles often result.
Solution: Use high-strength materials and consider reinforced mortar or pedestal systems in load-bearing zones.
Before permanently installing tiles, it’s always smart to do a dry layout—placing the tiles without adhesive. This allows you to:
Check your pattern
Ensure correct spacing
See how cuts will fall
Make adjustments before it’s too late
10. Not Following Manufacturer Instructions
This seems obvious, but it’s commonly overlookd. Each tile type, adhesive, grout, and sealer may have unique requirements regarding tempertures, drying times, mixing ratios, and tools.
Always follow the manufacturer’s guidelines, even if you’ve tiled before.
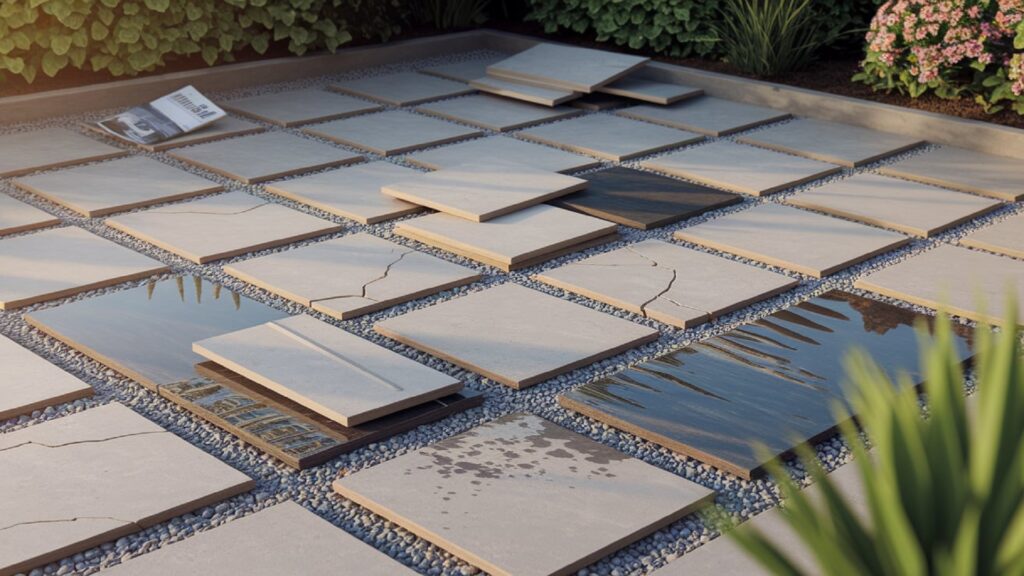
Common Mistakes People Make When Installing Patio Tiles
World Example: A Patio Tile Transformation
To better understand the potential of patio tiles, let’s look at a real-life project tht demonstrates how a simple backyard space was completely transformd into a stylish and functional outdoor retreat.
The Problem
Amanda and James, homeowners in a suburban neighborhood in Arizona, had a 20×15-foot concrete slab in their backyard. Over the years, the slab developed hairline cracks, faded color, and unsightly stains from barbecues and plant containers. They wanted a cleaner, more polished look to match their newly renovated kitchen that opened up into the patio.
Their goals:
Create a modern outdoor lounge area
Use durable, low-maintenance materials
Keep the existing concrete to save costs
Make the space suitable for summer entertaining
The Solution
After exploring several options—including painting the slab, adding outdoor rugs, and building a wood deck—they decided to go with patio tiles. Their final choice:
Material: 20”x20” textured porcelain patio tiles in a concree-look gray
Pattern: Running bond (brick-style layout)
Finish: Matte, anti-slip surface with R11 slip rating
Extras: Built-in LED strip lighting around the tile perimeter and two built-in planter boxes
The couple hired a local tile installer who cleaned and leveled the existing concrete, then used outdoor-rated thinset mortar to apply the tiles directly to the slab. A slight 1/8″ slope was added for better drainage.
The Results
The project took 4 days and cost approximately $4,800, including labor, materials, and sealant.
Amanda and James now use the patio daily—for morning coffee, evening cocktails, and weekend gatherings.
Furniture sits firmly without wobbling, and spills are easily wiped clean.
They reported increased interest from neighbors and even received a compliment from a real estate agent about the “resort-like” appeal of the space.
“The tiles completely changed the vibe,” Amanda says. “It feels like we added another room to our house without knocking down a wall.”
This example shows how patio tiles can upgrade not just the look, but also the function and value of a home—all while utilizing the existing foundation.
Choosing the Right Style & Maintenance Tips
Now that we’ve explored what patio tiles are, how to use them effectively, and seen a real-life example, let’s dive into style selection and ongoing care. These two elements are often overlooked, yet they’re key to mking the most of your outdoor investment.
Choosing the Right Style of Patio Tiles
The aesthtic of your patio tiles should match bth your home’s architecture and your personal taste. Below are several style directions to consider:
1. Modern Minimalist
Material: Large-format porcelain or smooth concrete tiles
Colors: Neutral greys, blacks, or whites
Patterns: Linear grid or staggered layouts
Best for: Urban homes, rooftop patios, sleek pool areas
2. Rustic Mediterranean
Material: Terracotta, limestone, or tumbled travertine
Best for: Garden patios, older homes, vineyard-style courtyards
3. Tropical Oasis
Material: Wood-look porcelain or rubbr dck tiles
Colors: Teak, walnut, rich browns
Patterns: Straight plank or chevron style
Best for: Pool decks, shaded garden lounges
4. Industrial Chic
Material: Concrete-look porcelain with exposed aggregate texture
Colors: Grey, charcoal, steel blue
Patterns: Large slabs, grid layout
Best for: Lofts, converted garages, outdoor kitchens
Tip: Mix tile styles with furniture and greenery for contrast. A textured tile works beautifully with soft textiles like cushions, hammocks, or outdoor poufs.
Maintenance Tips for Long-Term Beauty
To keep your patio tiles looking fresh and perfrming well for years, follow these expert maintenance tips:
1. Routine Cleaning
Sweep weekly to remove debris and prevent scratching.
Hose down monthly or aftr heavy use.
For greasy spills (like BBQ drippings), use a pH-neutral cleaner.
2. Preventive Protection
Use furniture pads under table and chair legs.
Consider an outdoor rug uner dining areas to rduce wear.
Place heavy planters on saucers or tile protectors.
3. Annual Check-Ups
Inspect grout for cracks and repair promptly.
Re-seal natural stone annually (or as recommnded).
In winter climates, check for lifting tiles due to frost heave.
4. Avoid Harsh Chemicals
Skip bleach or acid-based cleaners, especially on stone.
Use gentle cleaners labeled “safe for outdoor tiles.”
Bonus Tip: In spring and fall, rinse your patio with warm water and vinegar to remove pollen, grime, and mildew naturally.
Proactive Care = Long-Term Savings
Just like your kitchen or bathroom tiles, patio tiles thrive with proactive care. By keeping them clean, protected, and structurally sound, you not only preserve their beauty, you extnd their lifespan and delay costly repairs.
And with so many options available, you can always update accessries like planters, cushions, or lighting to refresh your outdoor space without changing the tile itself.
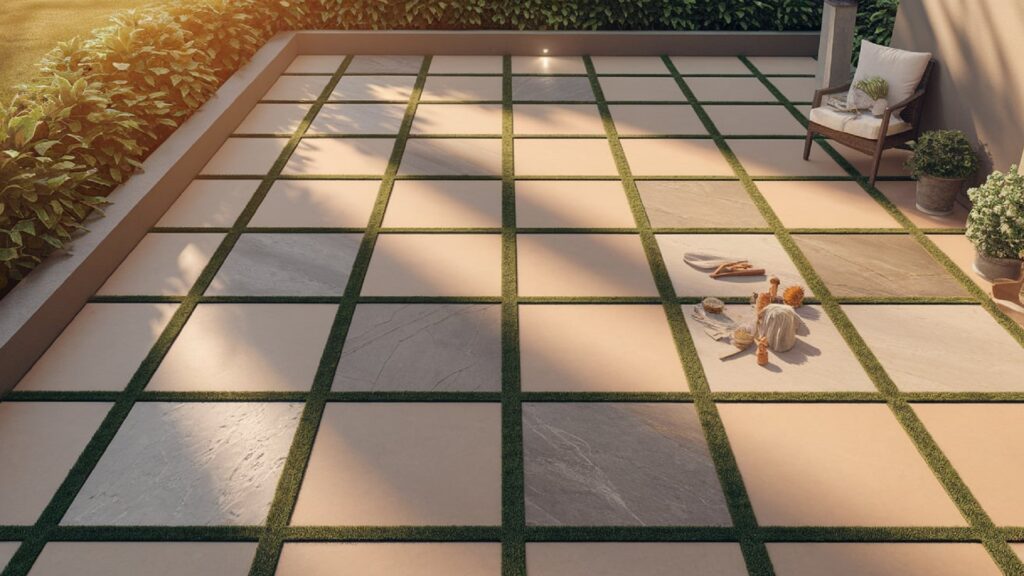
Choosing the Right Style & Maintenance Tips
FAQs: Frequently Asked Questions
When it coms to selecting and installing patio tiles, homeowners often have plenty of questions. You’re exploring materials, planning your layout, or considering maintnance, the answers can make or break your outdoor upgrade.
Below are five of the most frequently asked questions about patio tiles, each answered with clear, practical advice.
1. What is the best material for patio tiles?
The best material for patio tiles depends on your local climate, usage needs, and design preferences. Each material has its own strengths:
Porcelain tiles are highly durable, moisture-resistant, and perfect for almost any climate. They’re espcially good for modern designs.
Natural stone tiles (like slate, granite, or travertine) offer a timeless, organic look and are ideal for upscale patios. However, they often require sealing.
Concrete tiles are affordable and customizable with stains or stamps, but can crack in freeze-thaw climates if not properly installed.
Rubber or composite deck tiles are great for quick DIY jobs, safe arund kids, and soft underfoot—but they may not have the same long-term appeal as stone or porcelain.
Expert tip: If you’re in an area with wet conditions or seasonl frezing, frost-proof porcelain tiles with a textured finish are usually your safest bet.
2. Can I install patio tiles myself, or do I need a professional?
Yes, you can absolutly install patio tiles yourself, especially if you’re comfortable with basic construction tools and follow a step-by-step guide. Interlocking or floating tile systems are designed spcifically for DIYers and require minimal tools or expertise.
However, certain situations do call for professional installation:
If your patio base is uneven or sloped
If you’re using mortar and grout with heavy stone or porcelain tiles
If you’re integrating a complex design or pattern
If the area requires drainage correction or a concrete pour
Installing patio tiles properly ensures longevity and safety. If you’re unsure about prep work, drainage, or slope of your patio, it’s best to at least conslt a locl tiling professional or landscape contractor.
3. How do I maintain patio tiles after installation?
Maintaining your patio tiles is relatively easy and mostly depends on the material used. Here are the general rules:
Sweep debris frequently to prevent dirt and leaves from staining the grout.
Rinse tiles with water (and a mild soap if necessary) every few weeks.
Use a soft-bristle broom or mop for cleaning—avoid wire brushes, which can damage the surface.
Seal porous tiles (like natural stone) at least once per year with a penetrating sealer.
Check grout and edges for cracks, which can let moisture underneath tiles.
Avoid high-pressure washers on softer materials like limestone or tumbled travertine.
Also, be mindful of furniture with metal legs or sharp edges. Add protective pads underneath to avoid scratching or chipping the tile surface.
4. Are patio tiles slippery when wet?
This depends entirely on the surface texture and finish of the tile. Glossy or polished tiles—especially porcelain or ceramic—can be dangerously slippery when wet, making them unsuitable for outdoor areas.
To prevent slips and falls:
Choose tiles labeled “anti-slip,” “grip,” or “texturd.”
Look for a COF (Coefficient of Friction) rating of at least 0.6 or higher.
Select tumbled stone or structured finishes for pool decks or high-traffic wet areas.
Many outdoor tile collections are specifically designed for wet areas, so it’s always best to confirm slip-resistance before purchasing.
5. Can patio tiles be laid over an exsting concrete slab or deck?
Yes, this is one of the most popular and practical ways to upgrade an exsting patio. As long as the existing surface is:
Structurally sound
Level or properly sloped for drainage
Free of large cracks or crumbling edges
…you can install patio tiles directly over it.
Concrete slabs: Apply a bonding agent or tile adhesive suitable for outdoor use. If the slab has cracks, they should be filled and leveled before tiling.
Wood decks: Floating or interlocking deck tiles are ideal. For traditionl tiles, you’d need to create a new concrete base or use a tile-ready backer board system rated for exterior use.
Keep in mind: Tile installation adds thickness. Make sure you account for door clearances and drainage.
Quick FAQ Recap:
Question
Key Takeaway
Best material?
Porcelain for durability; stone for aesthetics
DIY or Pro?
DIY is possible; hire a pro for large or complex installs
Maintenance?
Sweep, rinse, seal (if needed), inspect grout
Slippery?
Choose anti-slip, textured surfaces with high COF
Over concrete?
Yes—if the surface is sound and properly prepped
These common questions cover most of the concerns people have when dealing with patio tiles—but if you have a unique situation, it’s always worth consulting with a tile specialist or landscape designer before beginning your project.
Author Remarks
In conclusion, if you’re looking to enhance your outdoor living space with a slution that’s both functional and visually appealing, patio tiles are hard to beat.
From modern rooftops to cozy garden patios, these versatile tiles offer a blnd of durability, style, and practicality. They can completely transform a dull backyard or concrete slab into a stunning extension of your indoor living space—without the high cost of major renovations.
Throughout this guide, we’ve explored:
What patio tiles are and how they differ from indoor tiles
The benefits of using them, such as durbility, design flexibility, slip-resistance, and ease of maintenance
A detailed, step-by-step overview of how to use patio tiles effectively, whether DIY or professionally installed
The most common mistakes to avoid when selcting and instlling your tiles
Real-world examples and dsign inspiration to spark your crativity
Answers to frequently asked questions so you can make informed decisions
And, finally, long-term style and maintenance tips to protct your invetment
With all this in mind, it’s clear that patio tiles aren’t just a trendy upgrade—they’re a smart, lasting solution for anyone who wants to get more out of their outdoor space. Whethr your goals are entertaining guests, relaxing solo, incrasing home value, or simply enjoying a cleaner, more organized ptio, patio tiles make it all possible.
And the best part? The variety of materials, textures, and patterns available today means thre’s a patio tile solution for every home, climate, and budget.

One response
[…] BestPatioTilesDIYPatioMakeoverOutdoorPatioTilesPoolDeckTilesWoodLookPorcelainPrevious […]