
Introduction of kitchen Accessories Wall
kitchen accessories wall is more than just a stylish accent—it’s a functional game-changer. Integrating tools like hooks, pegboards, and rails into the kitchen wall brings order, creativity, and efficiency all in one place.
You live in a compact urban apartmnt or a sprawling house, and a well-designed kitchen accessories wall transforms cluttered countrtops into streamlined, visually engaging zons.
What Is kitchen accessories wall?
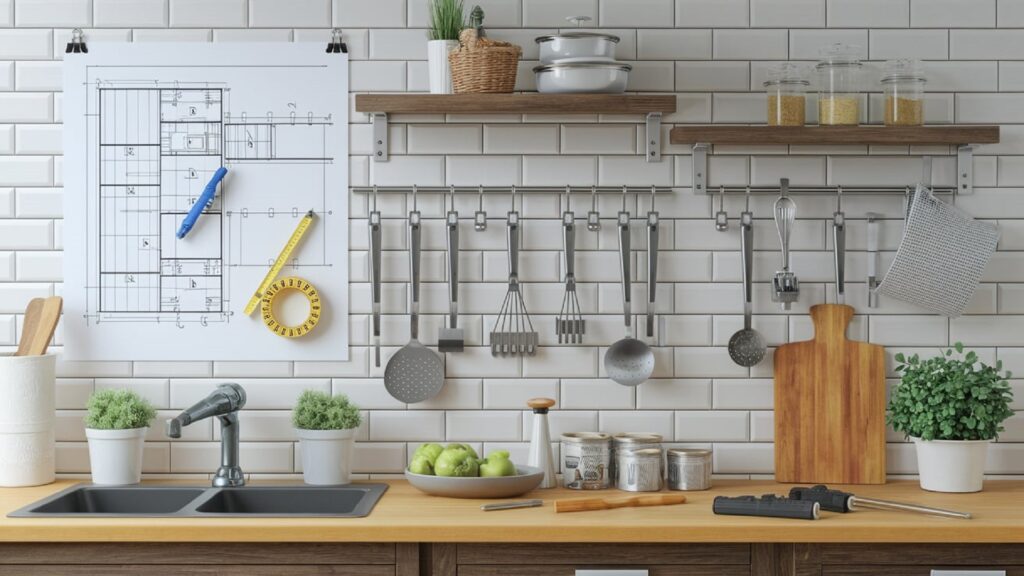
A kitchen accessories wall refers to any vertical kitchen surface—back wall, backsplash, or side wall—designed specificlly for string or displaying utensils, tools, cookware, and other accessories. Common installations include:
Related Post: Utensils
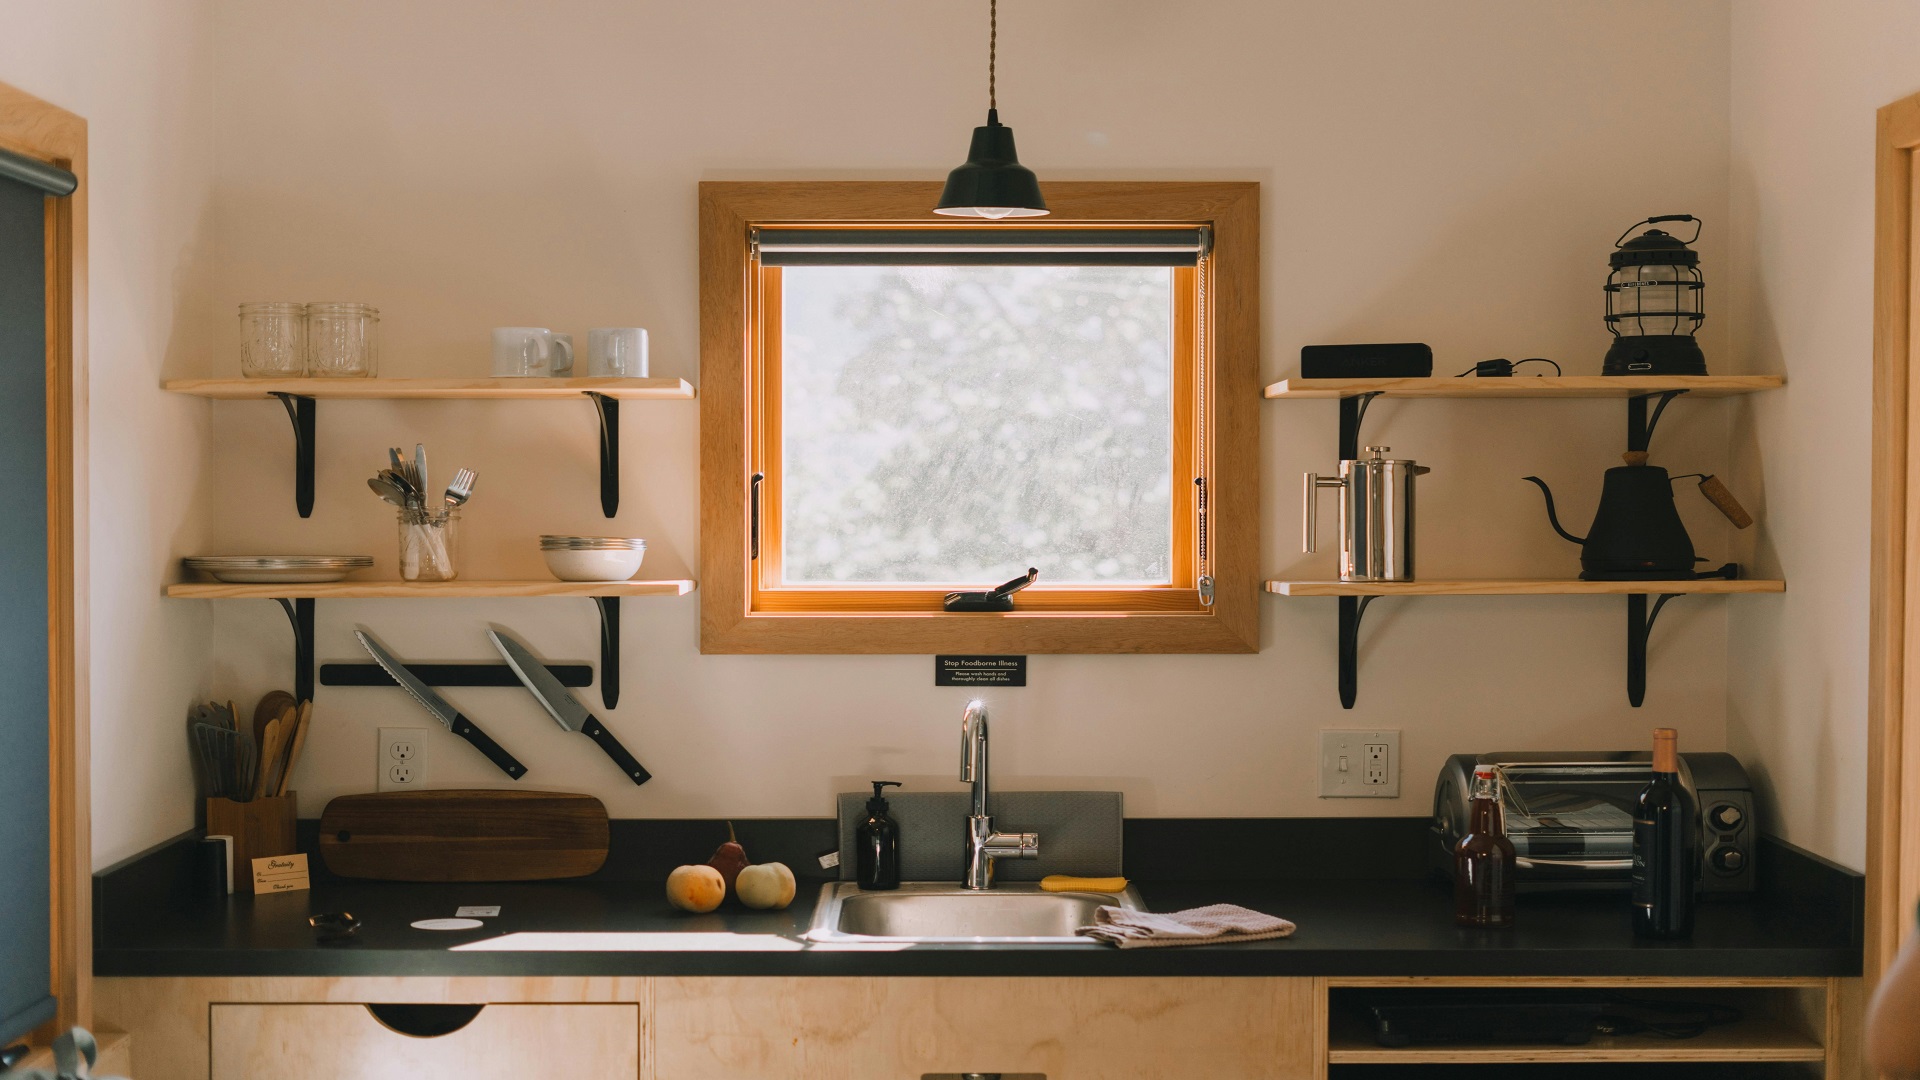
- Pegboards with hooks for pots, pans, and measuring cups
- Magnetic knife strips for sharp tools
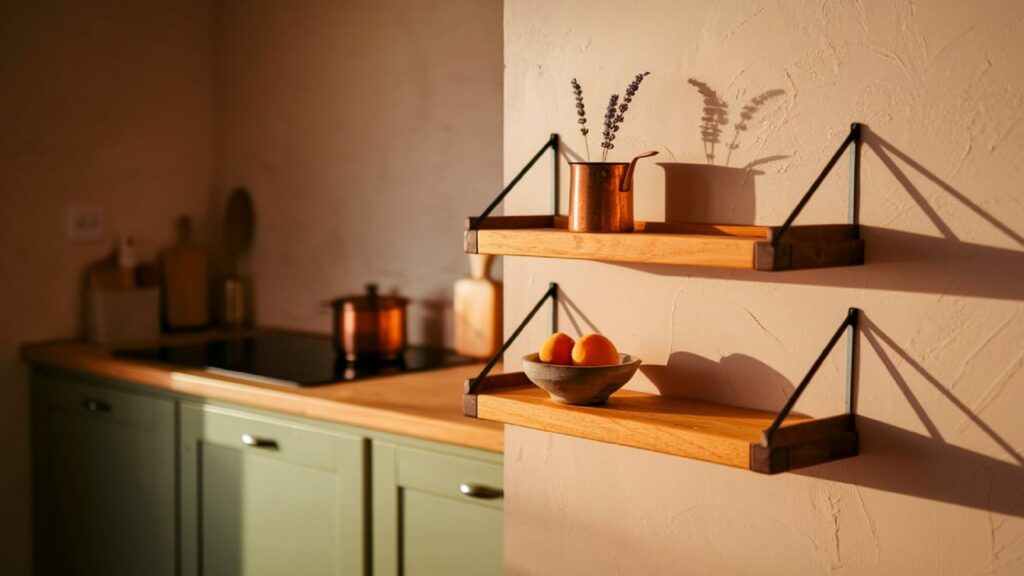
- Floating shelves or rails for spices, mugs, or small jars
- Hooks or rails beneath cabints for hanging utensils or towels
This setup serves a dual purpose: keeping everyday kitchen tools within easy reach and turning them into a decorative element.
History & Evolution of Wall‑Based Kitchen Storage
Wall storage in kitchens is far from a modrn invention. Historically, open shelving and racks were common in rustic farmhouss, where basic tools needed to stay accessible. Over time, cultural shifts and aesthtic trends— like the popularity of industrial-style pegboards and sleek magnetic strips—modernized the concept.
In recent years, interior design trends have emphasized both organization and visual charm. Today’s kitchen accessory walls are powerd by versatile fixtures like pegboards, magnetic bars, and modulr hooks, marrying form and function in dynamic kitchen designs.
Design Principles & Layouts for Your Kitchen Accessories Wall
Designing a kitchen accessories wall starts with more than just asthetics—it’s about maximizing function while complementing the overall kitchen style. From layout planning to choosing storage systems, thoughtful design is essential for a wall that’s bth practicl and beautiful.
Related Post: Kitchen Supplies Suppliers
Key Principles of Kitchen Accessories Wall Design:
- Zoning for Efficiency
First of all, group items based on use. For example, utensils and spice racks should go near the prep area, while pots and pans can be mounted closer to the stove. This reduces steps and boosts workflow. - Balance Between Visual & Functional
You don’t want your wall to feel cluttered. Mix open and closed storage if neded—such as a combination of visible hooks and concealed cabinets or baskets. - Height Matters
Consider accessibility. Items you use daily should be at arm’s height. Rserve upper and lower spaces for infrequently used tools. - Grid vs. Freeform Layouts
Pegboards provide a grid-like structure, perfect for modular organization. Alternatively, using staggered floating shelves or rails gives a more freeform and organic look. - Symmetry & Visual Harmony
Moreover, your kitchen accessories wall should reflect the same rhythm as the rest of your kitchen. Match metals (like stainless steel hooks with a steel faucet) or keep wood tones consistent.
Materials & Fixtures to Build Your Kitchen Accessories Wall
The materials you choose not only affct how your kitchen accessories wall looks, but also its durability and usability. Different surfaces and mounting options allow for endless customization. Here’s a breakdown:
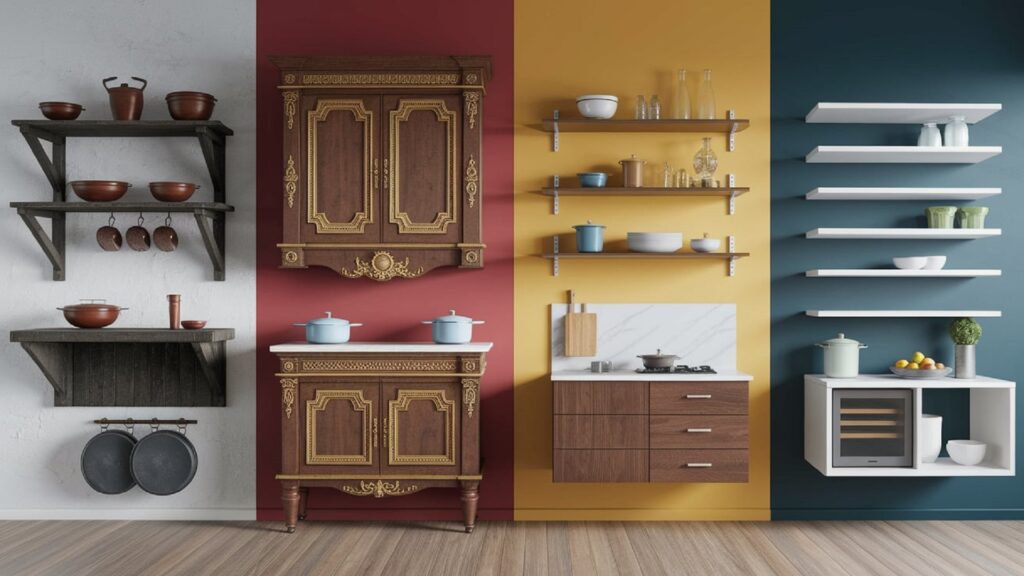
Wall Surface Types
- Tile Backsplash
Common in modern kitchens. Use adhesive hooks or rails, or drill with proper anchors for secure mounting. - Painted Drywall
Easiest to work with. Supports pegboards, floting shelves, and magnetic mounts. - Wood Paneling
A great surface for rustic or farmhouse-style accessry walls. Supports screws, hooks, and rails well. - Stainless Steel or Glass Panels
These are harder to modify but offer sleek looks. Adhesive-backed mounts work best here.
Popular Mounting Systems
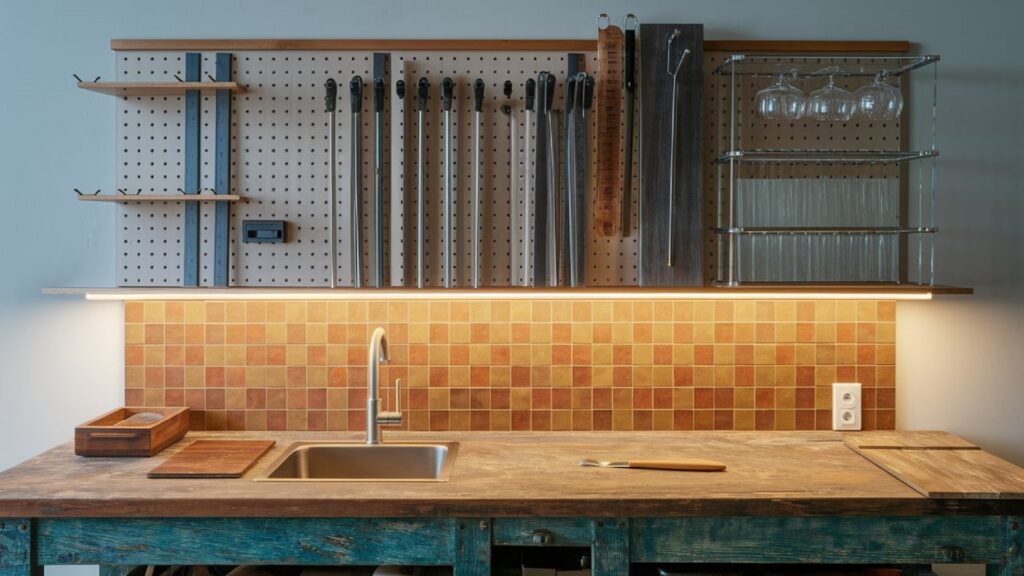
- Pegboards
Pegboards are extremely versatile. Moreover, they let you rearrange hooks, shelves, and baskets endlessly. - Magnetic Strips
Ideal for knives, metal spice containrs, and scissors. Be sure to install high-strength magnets for safety. - Floating Shelves
Offer depth. Great for holding small jars, mugs, or plants. - Tension Rods or Rails
Place these beneath cabints or between two wlls for flexible hanging space. - Wire Racks or Grid Panels
Provide a more industrial look. Easy to hook and hang items of different sizes. - Baskets (Wire or Woven)
Add texture and extra storage. Useful for fruits, rolled kitchn towls, or spice jars.
Creative Storage Ideas Using Your Kitchen Accessories Wall
Now that you understand the layout and materials, let’s look at clever and creative ways to bring a kitchen accessories wall to life. These ideas blend style and purpose for kitchens of all sizes.
A. Color-Coordinated Accessories
Choose all-black or coppr tools and hang them against a neutral pegboard or rail system. This creates visual unity and adds to the décor. In addition, colorful handles can inject playful energy.
B. Themed Zones
Create zones within your wall:
- A coffee station with mugs, filters, and a hanging spoon set
- A baking corner with whisks, measuring spoons, and spice racks
- A bar wall with cocktail tools and hanging wine glasses
C. Small Kitchen Solutions
In tight spaces, go vertical. Mount magnetic racks for knives and stack spice shelves upward. A fold-down mini shelf can double as a prep station.
D. Integrate with Smart Tech
Include a mounted tablet holder for recipes or smart assistants (like Alexa or Google Nest). You can even hang your smart speakr from the wall itself.
E. Seasonal Styling
Switch out seasonal tools and decorations. In winter, hang festive mugs and hot chocolate kits. In summer, switch to BBQ tools and herb jars.
F. Add Greenery
Small hanging plants or mounted herb gardens bring life and color to your kitchen accessories wall. Basil, thyme, and mint all thrive in kitchn light and add fragrance.
🟢 Quick Tip: Use hooks that support up to 5 kg (11 lbs) for heavier items like cast-iron pans. It ensures safety and keeps your wall setup long-lasting.
DIY Planning & Step-by-Step Installation of Your Kitchen Accessories Wall
One of the biggest advantages of a kitchen accessories wall is that it’s DIY-friendly. Whether you’re a seasond home improvement enthusiast or a total beginner, you can create an efficient and stylish wall system with some basic planning and tools.
A. Planning Your Wall Layout
Before you even pick up a drill or buy supplies, you ned a plan. Here’s how to begin:
1. Measure the Wall Space
Use a tape measure to determine the height and width of the area you want to use. Don’t forget to account for nearby windws, cabinets, or switches.
2. Define the Purpose
Ask yourself:
- Do you want a utility wall?
- A display area for decor and special tools?
- A hybrid of both?
Clarifying this will guide your choices on fixtures and layout.
3. Sketch a Layout
Draw a rough diagram of how you’d like your kitchen accessories wall to look. Include where rails, hooks, and shelvs will go. This will save you time during installation.
B. Tools & Supplies You’ll Need
- Pencil and measuring tape
- Level (a must for floating shelves and straight rails)
- Drill and wall anchors
- Pegboard or slatted wood panels (optional)
- Hooks, rods, baskets, shelves, magnetic strips
- Screws, nails, adhsive tape (if preferred)
C. Installation Steps (Step-by-Step)
Step 1: Mark the Mounting Points
Using your layout sketch, mark where each fixture will go with a pencil. Use a level to make sure everything is straight.
Step 2: Pre-Drill Holes
If drilling into tile, use a special tile bit and go slowly to avoid cracks. For drywall, use anchors to prevent the screws from loosening over time.
Step 3: Install Larger Fixtures First
Start with the biggest items—such as pegboards or long rails—then fill in the rest.
Step 4: Hang Accessories
Add hooks, baskets, and any items you plannd. Make adjustments as needed.
Step 5: Test Stability
Gently tug on mounted items to ensure they’re secure. Avoid overloading hooks.
Common Mistakes People Make with a Kitchen Accessories Wall
While the concept is straightforwrd, it’s easy to go wrong during planning or installation. Here are the most common mistakes to avoid:
Overloading the Wall
One of the most frequent issues is trying to hang everything. This makes the wall look chaotic and can led to fixturs breaking.
Poor Anchor Support
Skipping proper wall anchors—especially on drywall—will cause rails or hooks to pull out under pressure.
Ignoring the Work Triangle
If your wall is placed far from your prep, cook, or clean zones, you’ll los efficiency. A kitchen accessories wall should complement your cooking flow.
Lack of Visual Balance
Hanging tools randomly or using mixed metals/colors can make the wall look uncoordinated.
Choosing Cheap Materials
Plastic hooks and thin pegboards may look appeling due to their price, but they often don’t last and may buckle under the weight of kitchen tools.
Maintenance & Longevity Tips
A kitchen accessories wall is a living part of your kitchen. To keep it functional and stylish, ongoing maintenance is essential.
Regular Cleaning
Dust and grease can quickly accumulate on hanging utensils and exposed shelves. Wipe everything down weekly with a gentle cleaner.
Check for Loose Fixtures
Inspect screws, anchors, and hooks every few months. Tighten anything that feels wobbly.
Reorganize Seasonally
Your kitchen needs may shift throughout the year. Reorgnize your wall every 3–6 months to keep it relevnt.
Replace Worn-Out Accessories
Baskets and hooks can wear down. Swap them out as needed to maintain a neat appearance.
Kitchen Accessories Wall vs. Traditional Storage
How does a kitchen accessories wall stck up against standard kitchen storage options like drawers and cabinets? Let’s compare.
| Feature | Kitchen Accessories Wall | Traditional Cabinets/Drawers |
|---|---|---|
| Accessibility | Instant visibility & access | May require searching |
| Customization | Highly adaptable layout | Fixed shelves or compartments |
| Aesthetic Appeal | Visual & decorative | Concealed but uniform |
| Space Efficiency | Uses vertical space | Uses floor-level footprint |
| Cost | Low to moderate | Moderate to high |
Accessories walls provide both practical benefits and design flexibility, making them a perfect match for modern kitchens.
Real-Life Examples & Inspiration
To truly understand the value of a kitchen accessories wall, let’s look at real-life examples and design inspirtion. These setups range from minimalist to maximalist and offer practical takeaways for any kitchen type or size.
Example 1: The Minimalist Apartment Kitchen
Location: New York City
Kitchen Size: Under 60 square feet
Challenge: Limited drawer and cabinet space
Solution: The homeowner installed a vertical pegboard between the sink and fridge. Using all-black metl hooks, they hung everyday items like measuring spoons, spatulas, and scissors. A floating shelf above held small potted herbs and salt jars.
Result: Everything was within reach, no need for drawer organizers, and the space felt open and modern.
Key Takeaway: Even a narrow strip of wall can completely change how you store and use tools.
Example 2: Rustic Farmhouse Vibe
Location: Asheville, North Carolina
Kitchen Size: Medium (140 square feet)
Challenge: Maintaining a cozy, homey aesthetic without clutter
Solution: A reclaimed wood panel was mountd on a side wall and fitted with vintage hooks and woven baskets. Cast-iron pans, wooden spoons, and linen towels were displayed.
Result: The wall became a focal point—blending function with charm—and freed up drawer space for items that needed to be hidden.
Key Takeaway: Style doesn’t have to be sacrificed for storage.
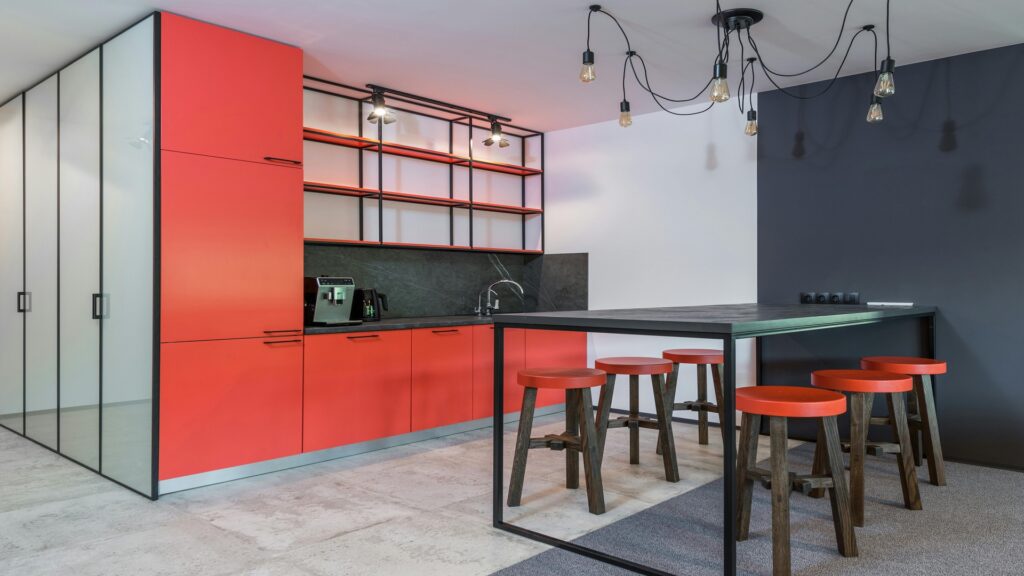
Example 3: Chef’s Open-Concept Kitchen
Location: San Francisco
Kitchen Size: Large open-plan (280 square feet)
Challenge: Daily heavy-duty cooking with lots of utensils and specialty tools
Solution: A heavy-duty steel rail system spanned an entire backsplash, combined with magnetic knife strips and under-cabint spice racks. Each area was “zoned” based on task: prep, cook, clean.
Result: The setup improved cooking speed and cleanliness, and allowed guests to admire the professional-grade tools.
Key Takeaway: For frequent cooks, zoning and accessibility are everything.
Example 4: Tiny Home Efficiency
Location: Austin, Texas
Kitchen Size: 38 square feet
Challenge: No room for full cabinets or drawers
Solution: The entire kitchen wall was used from countrtop to ceiling. Adjustable wire racks held everything from plates to pots, while a fold-down cutting board was mounted under a spice shelf.
Result: Maximum storage in minimal space—proof that the vertical wall is your best friend in tiny homes.
Key Takeaway: Don’t forget your vertical real estate!

12. FAQs About Kitchen Accessories Wall
Let’s now answer some of the most commn questions users have about installing and maintaining a kitchen accessories wall:
How do I choose the best location for a kitchen accessories wall?
The ideal spot is one near your primary work zone—often between the sink and stove. Look for an open wall, backsplsh, or even the inside of a pantry door. Make sure it’s accessible and not prone to moisture damage.
Can I create a kitchen accessories wall in a rental?
Yes! Many options, like adhesive hooks, suction cup rails, and frestanding pegboards, don’t require drilling. Just be sure to check your lease and use damage-free products. IKEA and 3M Command offer renter-friendly solutions.
How much weight can my accessories wall hold?
That depends on your materials. Drywall with basic anchrs can hold up to 20–30 lbs. Heavy-duty pegboards or steel rails with secure anchrs can support much more. Always distribute weight evenly and avoid placing all heavy items in one area.
Do accessory walls only work with modern kitchens?
Not at all. While modern and industrial styles use sleek metal systems, traditional kitchens can use wood, wrought iron, or woven matrials for a softer look. The accessories wall is a flexible solution that adapts to any aesthetic.
What are the best items to store on a kitchen accessories wall?
Here are popular items you can hang or store:
- Utensils (spoons, ladls, spatulas)
- Knives (using a magnetic strip)
- Cutting boards
- Measuring cups/spoons
- Spice racks
- Potholders and towels
- Mugs and wine glases
- Small pots or pans
Author Remarks
A kitchen accessories wall is one of the smartest and most versatile upgrades you can make to your cooking space. Whethr you’re dealing with limited storage, trying to stay organized, or just want to display your tools beautifully, this solution delivers across the board.
Let’s recap the key takeaways:
- A kitchen accessories wall maximizes vertical space and keeps tools accessible.
- It enhances efficiency by putting your most-used items within easy reach.
- It blends form and function—mking your kitchen bth mre usful and more stylish.
- It can be customized for all budgets, kitchen sizes, and aesthetics.
- You can DIY it with minimal tools or go pro with advanced fixtures.
Ready to transfrm your kitchen? Start measuring, plnning, and mke your kitchen accessories wall the centrpiece of your cooking space today!
1 Comment