

Introduction of Backsplash Kitchen Backsplash
Backsplash kitchen backsplash is one of those design features that might seem minor but plays a huge role in both the aesthetics and functionality of your kitchen. First of all, the backsplash acts as a protctive layer for your kitchen walls, shelding them from water splashes, cooking grease, and everyday messs. But beyond mere protection, backsplash kitchen backsplash also serves as a central design element that can define the style and feel of your cooking space.
If you’re planning a kitchen renovtion or simply want to update your kitchen’s look, understanding backsplash kitchen backsplash is crucial. In this comprehensive guide, what backsplash kitchen backsplsh entils, why it matters, and how to choose and install it effectively. We’ll also highlight common mistakes homeownrs make and provide expert tips to help you avoid costly errors. You’ll have all the knowledge needed to select the perfct backsplash for your kitchen.
What is Backsplash Kitchen Backsplash?
To fully appreciate the importnce of backsplash kitchen backsplash’s, we first need to understand what it is. Also Visit this Link: Kitchen Floor Tile Ideas
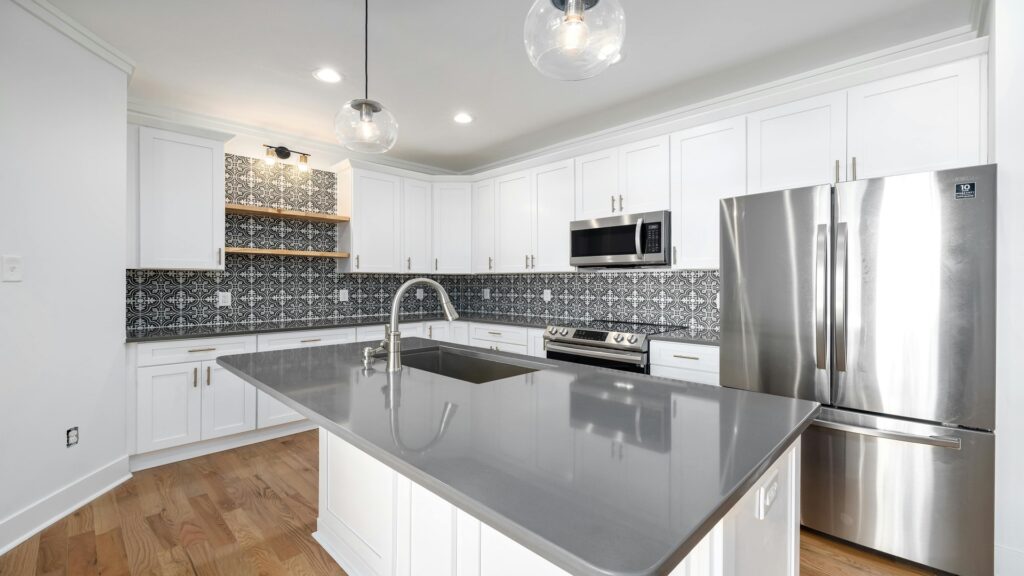
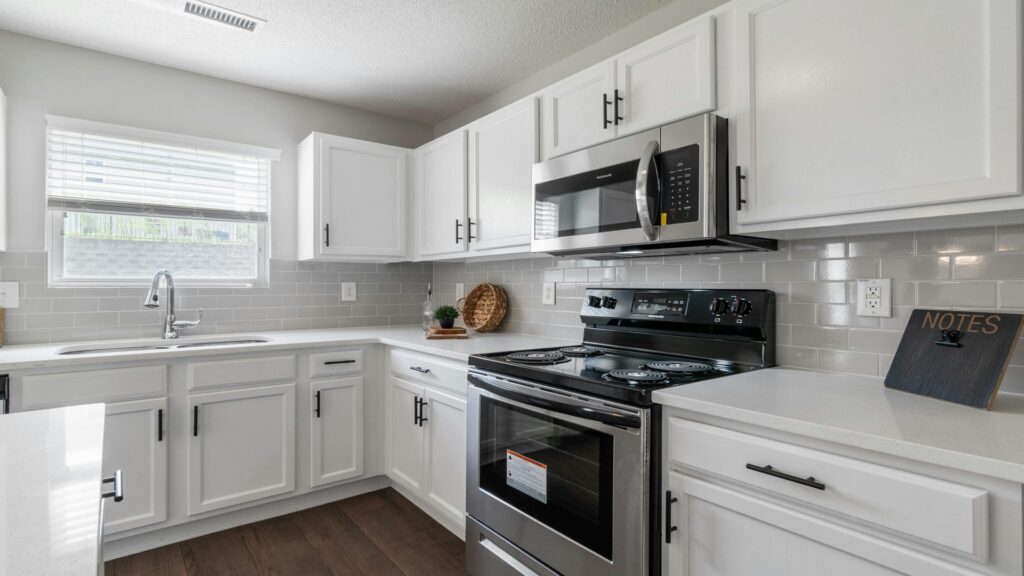
A backsplash’s is a vertical surface, usually made of tile, glass, metal, stone, or other durable materials, installed on the wall behind your kitchen countertop, stove, and sometimes the sink area. Its primary role is to protect the walls from splashes caused by cooking, washing dishs, or food prep. Kitchen backsplash’s has evolved far beyond a simple protective panel. It is now a key decortive feature in kitchen design.
The phrase “backsplash kitchen backsplash’s” might seem repetitive, but it emphasizes the focus on kitchen-specific backsplashes — designed and tailored specifically for the cooking and food prep areas, where splash protction is most critical.
Backsplash kitchen backsplash’s can cover a small area — typically 15 to 18 inches high — or extend to the bottom of upper cabinets, and in some designs, all the way to the ceiling. The choice depends on your kitchen layout, style prefrencs, and budget.
Common Materials Used in Backsplash Kitchen Backsplash
- Ceramic and Porcelain Tile: The most populr option due to variety, affordability, and ease of installation.
- Glass: Offers a sleek, modern look and can be clear, frosted, or colored.
- Natural Stone: Materials like marble, granite, or slate add luxury and texture but require more maintenance.
- Metal: Stainless steel or copper backsplashs provide an industrial, contemporary feel and are easy to clean.
- Peel-and-Stick Options: Great for quick DIY projects or renters seeking temporary style updates.
Choosing the right material depends on your kitchen’s style, how much cleaning effort you’re willing to invest, and your budget.
Benefits of Backsplash Kitchen Backsplash
Why invest time and money into backsplash kitchen backsplash’s? There are many reasons beyond just the obvious protction.
Protection Against Damage
One of the most important benefits of backsplash kitchen backsplashes is protecting your walls. Cooking areas are prone to grease splatters, water drips, and food stains. Without a backsplash, your walls can becme damaged, stained, and even develop mold in damp areas.
Easy to Clean
Materials used in backsplash kitchen backsplash’s are designed to be easy to wipe down and keep spotless. Unlike painted drywall, which can absrb stains and degrade over time, a tile or glass backsplash can be cleaned quickly with mild detergent and a sponge.
Enhances Kitchen Style
Backsplash kitchen’s backsplashes ares also a major design element. It can serve as a focal point or subtle backdrop depnding on your choice. For instance, a bright mosaic tile backsplash adds color and pattern, while a simple subway tile offers timeless elegance.
Increases Home Value
Investing in a stylish, durable backsplash can boost your home’s resale value. Potential buyers often appreciate kitchens with thughtful design details that also protect the space from wear and tear.
Versatility and Customization
Backsplash kitchen backsplash’s comes in countless shapes, colors, and materials, letting you customize your kitchen to reflct your style. You can mix and match tiles, create patterns, or install bold colors for a unique look.
Durability
High-quality backsplashes withstnd heat, moisture, and frequnt cleaning without losing their appeal. This makes them a smart, long-lasting investment.
How to Use Backsplash Kitchen Backsplash Effectively
To get the most from your kitchen backsplash, a careful apprach is key. Here are steps to guide your decision-making and installation:
1. Assess Your Kitchen Style and Needs
Consider your kitchen’s overall aesthetic. Are you aiming for modern minimalism, rustic charm, or something eclectic? Your backsplash should complemnt cabinetry, countertops, and flooring. Also, think about how much cooking you do—heavy cooks might prefer materials that withstand grease and heat better.
2. Select the Best Material
With so many options, material choice can feel overwhelming. Tile is versatile and affordable, glass is sleek and easy to clean, and metal is durable and stylish. Think about maintenance—natural stone looks gorgeous but can stain without sealing.
3. Measure Your Space
Accurate measurements ensure you buy enough material without excssive waste. Measure width and height of areas behind the sink, stove, and counters. Don’t forget to consider outlets and switches.
4. Decide on the Height and Coverage
Standard backsplashes are around 15 inches high. However, extending the backsplash’s to the bottom of upper cabints (around 18 to 24 inches) offers better protection and a polished look. Some designs even go floor to ceiling, especially around stoves.
5. Prepare the Wall
Before installation, walls must be clean, smooth, and dry. Remove any grease or old wallpaper. A clean surface helps adhesives bond properly.
6. Install Properly
Whether DIY or professional, follow manufacturer’s instructions closely. For DIYers, ensure you have the right tools—tile cutters, spacrs, trowels, and grout. Professionals can guarantee perfect alignment and durable adhesion.
7. Seal and Maintain
Apply sealants on grout lines and porous matrials to prevent staining and moisture damage. Clean regularly to maintain shine and hygiene.
Common Mistakes People Make with Backsplash Kitchen Backsplash
Even though installing a backsplash’s kitchen backsplash’s can seem straightforward, many homeownrs make avoidable errors that affect the look and durability of their bcksplash. Knowing these mistakes beforehand can save you time, money, and frustration.
1. Choosing the Wrong Material for Your Kitchen Use
One common mistake is selecting a backsplash’s material that doesn’t fit your lifestyle or kitchen habits. For example, natural stone backsplashes like marble look elegant but are porous and can stain easily without regulr sealing. On the other hand, some metals might scratch or tarnish if not cared for properly.
2. Incorrect Measurements
Underestimating or overestimating your backsplash area is a classic error. Buying too few tiles leads to project delays, while excess materil means wasted money. Always measure twice, including tricky spaces around outlets, windows, and appliances.
3. Skipping Wall Preparation
Applying tile or panels over unclean, greasy, or uneven walls can cause poor adhesion, leading to tiles falling off or grout cracking. Make sure the wall surface is fully clean, dry, and smooth before installtion.
4. Overcomplicating the Design
While creativity is encouraged, overly complex backsplash’s designs can overwhelm a kitchen, especially in smallr spaces. Busy patterns or mixing too many colors might clash with cabinetry and countrtops rather than complement them.
5. Ignoring Sealing and Maintenance
Neglecting to seal grout or porous surfaces leads to stains, mold growth, and discoloration. Regular maintnance ensures your backsplash kitchen backsplash’s stays pristine and functional for years.
Advanced Tips for Choosing and Installing Backsplash Kitchen Backsplash
As you continue to explore backsplash kitchen backsplash’s options, here are some professional tips to help you creat a stunning and long-lasting result:
Consider the Color and Pattern Impact
Light-colored backsplashes tend to brighten a kitchen and create an open feel, especially in smaller spaces. Dark backsplashes add drama and contrast but may make the space feel cozier. Pattrns—such as herringbne, chevron, or mosaic—draw the eye and add personality.
Mix Materials for Visual Interest
Don’t be afraid to combine materials like glass tiles with stone accents or metal trims for a layered effect. This approach works well in modern kitchns seeking unique textures.
Pay Attention to Grout Color
Grout isn’t just filler; it plays a big role in the overall appearance. Matching grout to tile color creates a seamless look, while contrsting grout highlights tile shapes and patterns.
Use Quality Adhesives and Tools
Low-quality glue or grout can lead to cracking and falling tiles. Invest in good materials and proper tools, or hire professionals for best results.
Plan for Lighting
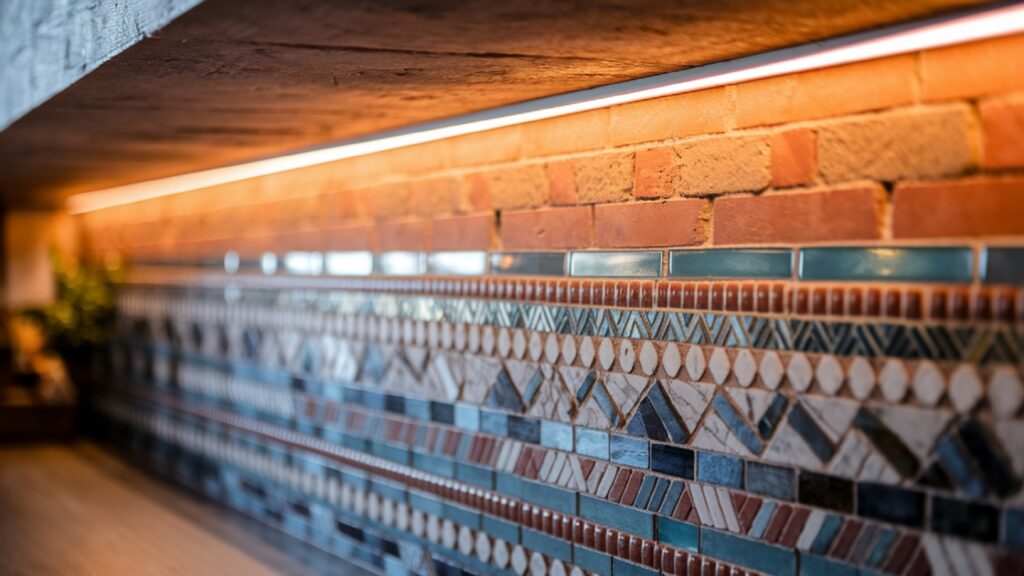
Under-cabinet lighting can highlight your backsplashs kitchen backsplash’s beautifully, emphsizing textre and color. Consider LED strips or puck lights.
Exploring Popular Styles of Backsplash Kitchen Backsplash
The style of backsplash kitchen backsplash you choose can dramatically influence your kitchen’s vibe. Here are a few popular styles to considr:
Subway Tiles
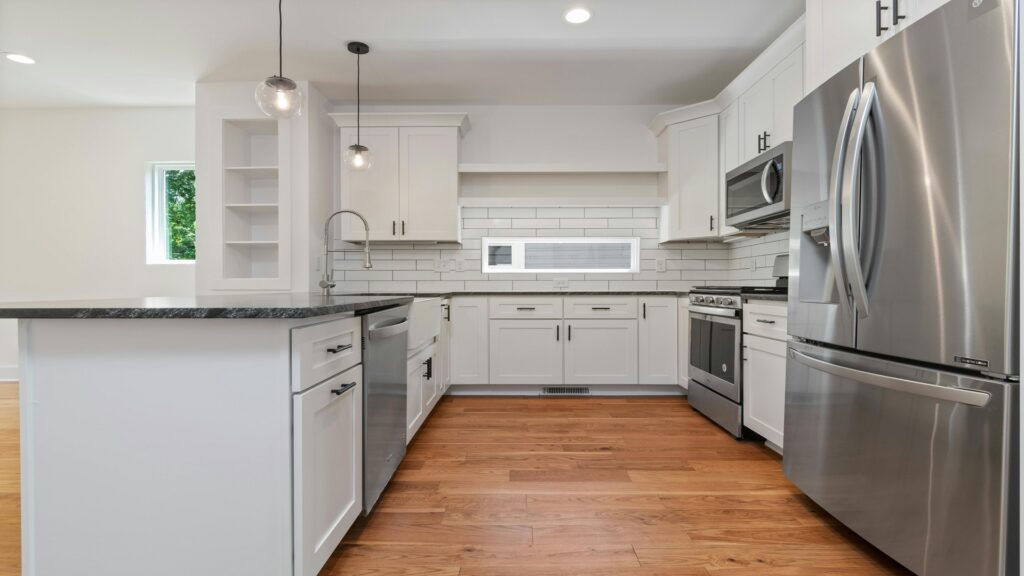
Classic and versatile, subway tiles are rectangular ceramic tiles often arranged in a brick pattern. They suit almost any kitchen style and are easy to clean.
Mosaic Tiles
Small tiles arranged in patterns or imags create vibrant backsplashs. Mosaics can be made of glass, ceramic, or stne.
Large Format Tiles
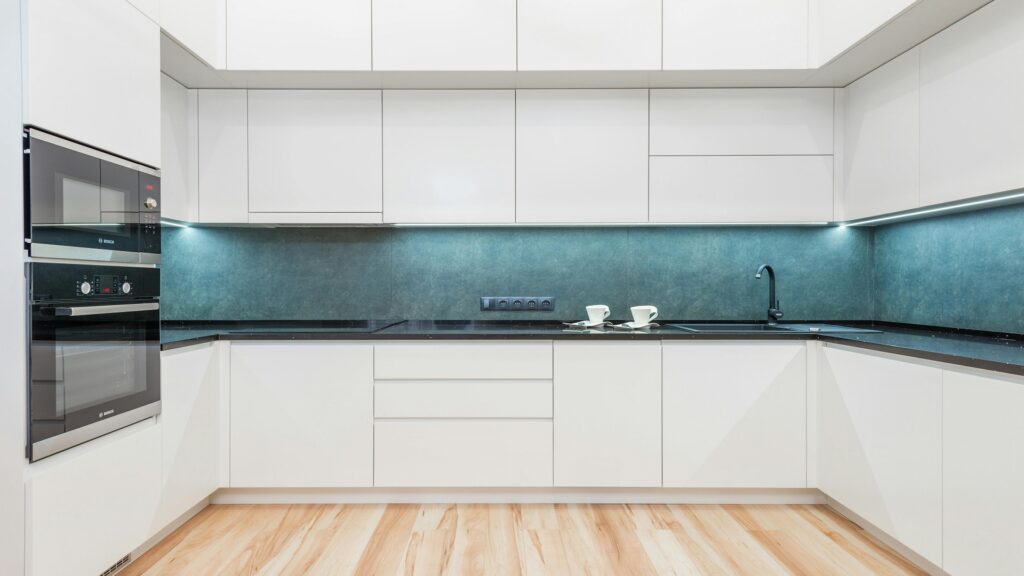
Large tiles create a sleek, modern look with fewer grout lines, making cleaning easier and giving a spacious feel.
Natural Stone
Marble, granite, and slate backsplashes add luxury and texture but need sealing and more care.
Metal Panels
Stainless steel or copper panels offer an industrial or contemprary edge, resist heat well, and are easy to clean.
How to Install a Backsplash Kitchen Backsplash: A Step-by-Step DIY Guide
Installing a backsplash kitchen backsplash yourself can be a rewarding project, saving money and adding a persol touch to your kitchen. However, it requires careful planning and attention to detail. Here’s a comprehnsive step-by-step guide for beginners:
Step 1: Gather Your Materials and Tools
- Tiles or backsplash panels
- Tile adhesive or thinset mortar
- Grout and grout sealer
- Notched trowel
- Tile spacers
- Tile cutter or wet saw
- Sponge and bucket for cleanup
- Measuring tape, pencil, level
- Safety gear (gloves, goggles)
Step 2: Prepare the Wall Surface
Remove any existing backsplash or wallpaper. Clean the wall thoroughly with a degreaser to remove kitchen grease. Fill any holes or crcks and sand rough spots until the wall is smooth and dry.
Step 3: Measure and Plan Your Layout
Measure the width and height of your backsplash area. Lay out your tiles on a flat surface to plan your pattern and minimize small cuts near edgs. Use a level to mark guidelines on the wall to keep tiles straight during installation.
Step 4: Apply Tile Adhesive
Using a notched trowel, spread tile adhesive evenly on a small section of the wall starting from the bottom center. Work in manageable sections to prevent drying before tiles are set.
Step 5: Place Tiles on the Wall
Press tiles firmly into the adhesive along your guidelines. Use tile spacers between tiles to keep consistent grout lines. Cut tiles as needed to fit edges, outlets, and corners.
Step 6: Let Adhesive Dry
Allow the adhesive to dry for at least 24 hours before grouting. Follow the manufacturer’s instructions for drying times.
Step 7: Apply Grout
Mix grout accrding to package directions. Use a rubber float to spread grout diagonally across the tiles, pressing it into the spaces. Wipe off excess grout with a damp sponge, rinsing frequently.
Step 8: Seal the Grout
Once grout is fully dry, apply grout sealer to protect against stains and moisture. This step is crucial for maintaining a clean backsplsh kitchen backsplash.
Step 9: Clean and Inspect
Clean the tiles thoroughly to remove any grout haze. Inspct your work for any loose tiles or gaps and fix as needed.
Maintaining Your Backsplash Kitchen Backsplash for Longevity
Proper maintenance will keep your backsplash kitchen backsplsh looking fresh and new for years. Here’s how to care for different materials:
- Ceramic and Porcelain Tiles: Wipe regularly with mild soap and water. Avoid abrasive cleaners that scratch tile surfaces.
- Glass: Clean with a glass cleaner or vinegar solution to maintain shine.
- Natural Stone: Clean with stone-safe cleaners. Reseal annually to protect against stains.
- Metal: Use non-abrasive cleaners and a soft cloth to avoid scratching. Polishing agents can help maintain luster.
For grout, routine cleaning and resealing every 6 to 12 months prevent mold and discolortion. If grout stains appear, a baking soda paste or grout cleaner can help remove them.
Eco-Friendly Backsplash Kitchen Backsplash Options
If sustainability is important to you, consider these environmntally friendly backsplash materials and practices:
Recycled Glass Tiles
Made from post-consumer glass, these tiles add color and sparkle while reducing landfill waste.
Reclaimed Wood Panels
Treated for moisture resistance, reclaimd wood offers warmth and character with minimal environmental impact.
Natural Stone from Local Sources
Sourcing stone locally reduces transportation emissions and supports regional businesses.
Low-VOC Adhesives and Sealants
Choose adhesives and sealants with low volatile organic compunds (VOC) to improve indoor air quality.
DIY Upcycling Projects
Use materials like old bricks, broken tiles, or bottle caps to create unique, artistic backsplash designs with minimal environmentl footprint.
How Backsplash Kitchen Backsplash Adds Value to Your Home
A well-chosen backsplash kitchen backsplash can significntly enhance your home’s market appeal and resale value.
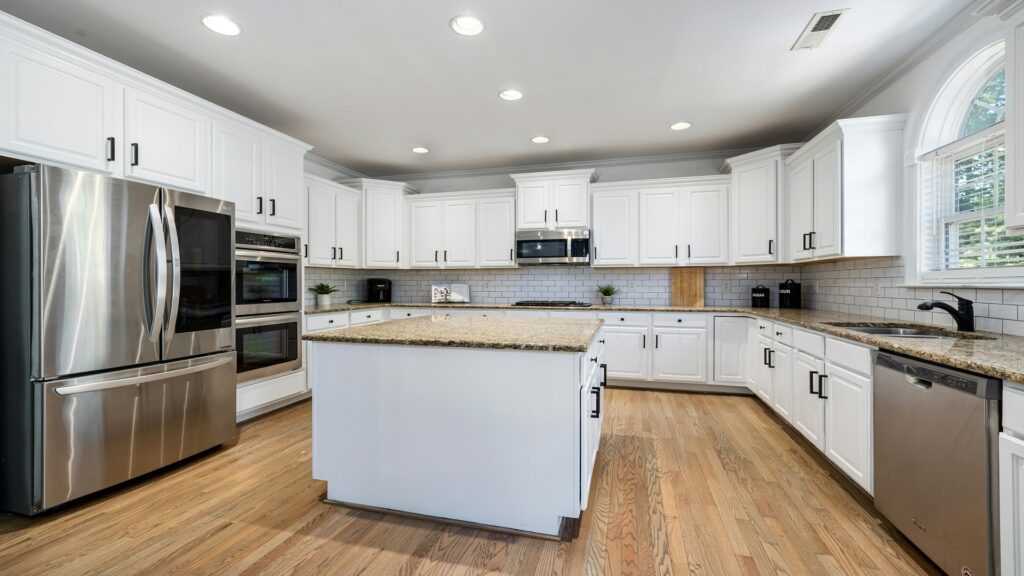
- Visual Appeal: A stylish backsplash can make your kitchen stand out, creating a modern or classic look that buyers find attractive.
- Functional Upgrade: Protective backsplashs indicate a well-maintained kitchen, signaling fewer repair concerns to buyers.
- Trendy vs. Timeless: Choosing timeless materials like subway tile or neutral colors can appeal to a broader audince. Trendy designs may date quickly and deter some buyers.
- Increased ROI: Kitchen renovations with updated backsplashes typically see a strong return on investment, often recuping a large portion of the upgrade cost.
Real estate experts recommend investing in backsplash kitchen backsplash as part of a kitchen remodel to maximize home value and buyer interest.
Popular Color Palettes for Backsplash Kitchen Backsplash
Choosing the right color palette for your backsplash kitchen backsplash is crucial to set the mood and harmony of your kitchen. Here are some populr color themes and why they work well:
1. Classic White and Neutral Tones
White subway tiles or neutral beige and gray tones create a timeless, clean look. They brighten the space, make it feel larger, and easily complemnt any cabinetry or countertop.
2. Bold Blues and Greens
Deep navy, teal, or emerald green tiles add a rich pop of color without overwhelming. These hues work wonderfully in modrn or coastal kitchens and pair well with natural wood accents.
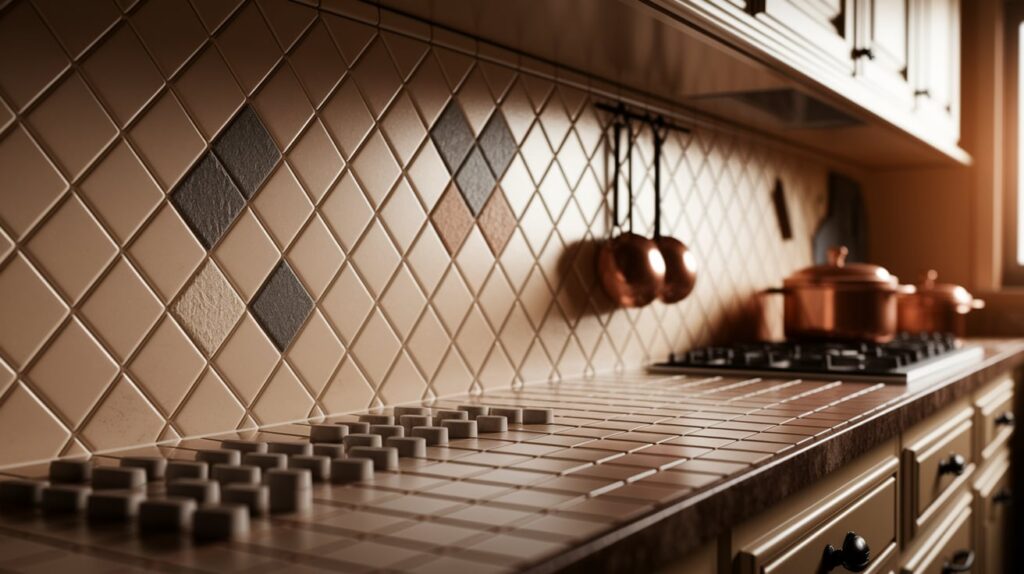
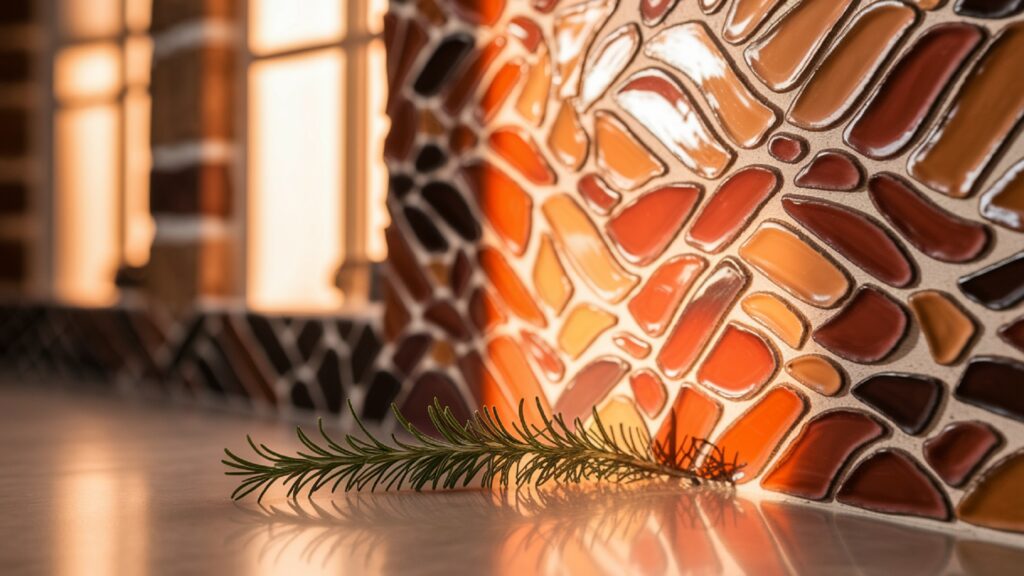
3. Warm Earth Tones
Terracotta, burnt orange, warm browns, and soft yellows bring a cozy, rustic vibe. These colors fit farmhouse or Mediterranen styles, adding warmth and character.
4. Monochrome Black and White
High-contrast black and white patterns create a graphic, contemprary feel. Black grout with white tiles or patterned black-and-white mosaics is popular for a dramatic effect.
5. Metallic Sheens
Silver, gold, copper, or bronze metallic finishes bring glamour and shine. They’re perfect for industrial or modern kitchens, adding texture and reflecting light.
Tips for Choosing Colors
- Consider the kitchen size—light colors open up small kitchens.
- Match or complement your countertop and cabinetry tones.
- Use accent colors to create visual interest without overwhlming the space.
The History and Evolution of Backsplash Kitchen Backsplash
Backsplash kitchen backsplash has a long, fascinating history that shows how kitchen design evolved alongside technology and culture.
Early Origins
The concept of protecting kitchen walls dates back centuries when homes used simple wood or stone panels behind cooking areas to prevnt soot and grime buildup. These early “backsplashes” were purely functional.
19th to Early 20th Century
With industrial advances, ceramic tiles became affordable and popular. Art Deco and Victorian-era kitchens featured intricate tile pattrns and colorful mosaics as decorative elements.
Mid-Century Modern Era
From the 1940s to the 1960s, clean lines and minimalist designs took over. Subway tiles and solid color backsplashes dominated, reflecting the modernist movement’s emphasis on simplicity and functionlity.
Contemporary Trends
Today’s backsplash kitchen backsplash options are incredibly diverse, mixing materials like glass, metal, and stone. Technolgy also allows for custom-printed tiles and eco-friendly materials, showing how backsplash design balances art and utility.
Maintenance Hacks and Troubleshooting for Backsplash Kitchen Backsplash
Keeping your backsplash kitchen backsplsh pristine doesn’t have to be a chore. Here are expert hacks and solutions to common issues:
Preventing Mold and Mildew
Ensure grout is sealed properly and cleaned regularly. Use a mixtre of vinegar and water or baking soda paste for natural mold removl. Improve kitchen ventilation to reduce moisture buildup.
Fixing Cracked or Loose Tiles
Small cracks can be repaired with tile epoxy or grout filler. For loose tiles, carefully remove and reattach with fresh adhesive.
Removing Stubborn Stains
Oil and grease stains respond well to baking soda scrubs or commercial tile cleaners. Avoid harsh chemicals on natural stone; instead, use a specialized stone cleaner.
Protecting Metal Backsplashes
Prevent fingerprints and oxidation by wiping with a mixture of mild soap and water, followed by a dry microfiber cloth. Avoid abrasive pads that scratch surfaces.
Refreshing Grout Color
Over time, grout may discolor. You can recolor grout using grout paint or colorant kits available at hardware stores, revitlizing your backsplash’s appearance.
Creative DIY Design Ideas for Your Backsplash Kitchen Backsplash
Installing a backsplash’s kitchen backsplash’s yourself gives you a chance to add a unique personality to your kitchen. Here are some inspiring DIY design ideas:
1. Patterned Tiles for Visual Impact
Use patterned ceramic or cement tiles to create a bold statement wall behind your stove or sink. Mix and match patterns or choose a repeting motif for a vintage or Mediterranean vibe.
2. Herringbone and Chevron Layouts
Instead of traditional grid patterns, lay rectangular tiles in herringbone or chevron patterns. These designs add movement and texture without needing colorfl tiles.
3. Mixed Materials
Combine tiles with other materials like wood or metal strips to create layered, tactile backsplashes. For example, a stone tile backsplash framed by reclaimed wood adds rustic charm.
4. Mosaic Accents
Add mosaic tile inserts or borders within a plain tile backsplash for color pops and intricate detail. This works well behind stove areas or as a backsplsh “window.”
5. Painted Backsplashes
For renters or budget-conscious updates, paint a section of your wall with high-quality kitchen-grade paint and stncil or hand-paint designs that mimic tile patterns.
Comparing Popular Backsplash’s Kitchen Backsplash’s Materials
Understanding the pros and cons of each backsplash’s materil helps you make an informed decision tailord to your kitchen needs.
| Material | Pros | Cons | Cost Range (per sq.ft.) |
|---|---|---|---|
| Cermic Tile | Durable, affordable, easy to clean | Can chip or crack, requires careful installation | $5–$15 |
| Porcelain Tile | More durable than ceramic, stain-resistant | Harder to cut, can be more expensive | $7–$20 |
| Glass Tile | Sleek, easy to clean, reflects light | Cost Range (per sq ft.) | $10–$30 |
| Natural Stone | Luxurious, unique patterns | Porous, requires sealing, higher maintenance | $15–$40 |
| Metal (Stainless Steel, Copper) | Heat-resistant, modern look, easy to clean | Can scratch or dent, fingerprints visible | $20–$50 |
| Peel-and-Stick | Easy DIY, inexpensive | Less durable, not heat-resistant | $5–$15 |
| Reclaimed Wood | Eco-friendly, warm aesthetic | Needs treatment against moisture | $10–$30 |
Budgeting Your Backsplash’s Kitchen Backsplash’s Project
Knowing how to budget will help keep your backsplash’s kitchen backsplash’s project on track financially.
Estimate Material Costs
Material choice heavily influences cost. Ceramic and peel-and-stick tiles are budget-friendly options, while naturl stone and metal backsplashs tend to be pricier.
Factor in Labor
Professional installation can cost $30–$50 per hour or more, depending on complexity. DIY installation saves labor costs but requires time and effort.
Include Tools and Supplies
Don’t forget to budget for tools such as tile cutters, adhesive, grout, spacers, and sealers. Some are one-time purchases; others you may already own.
Account for Waste and Overages
Always purchase 10-15% more material than measurd to cover cutting waste and mistakes.
Plan for Unexpected Costs
Set aside 10-20% of your budget for srprises like wall repairs or additional preparation work.
FAQs About Backsplash Kitchen Backsplash
What is the best backsplash material for durability and easy cleaning?
Ceramic and porcelain tiles are popular for their durability and ease of cleaning. Glass is also very easy to wipe down, but may scratch if not handled carefully. Stainless steel backsplashes are extremly durable but can show fingerprints.
How high should a kitchen backsplashs be installed?
Most backsplashes are 15 to 18 inches high, covering the space between the countertop and the bottom of upper cabinets. Taller backsplashes extending 24 inches or more provide better protection and can serve as a design statement.
Can I install a backsplashs kitchen backsplashs myself?
Yes, many DIYers successfully install tile backsplashes with the right preparation and tools. However, professionl installers can save time and ensure perfect results, especially with complex designs.
How do I maintain grout in a backsplashs kitchen backsplashs?
Clean grout regularly with mild soap and water. Apply grout sealer every 6 to 12 months to prevnt stains and moisture damage. Avoid harsh chemicals that can erode grout.
Are peel-and-stick backsplash options durable?
Peel-and-stick backsplashes are great for rentrs or quick updates but generally don’t last as long as tile or stone. They can peel off in high-moistur areas or with heat exposure.
Author Remarks
The backsplash kitchen backsplash is an essential element that combines functionality with style in any kitchen. From protcting your walls against stains and moisture to serving as a focal point that enhances your kitchen’s aesthetic, choosing the right backsplash involves considering materials, colors, patterns, and maintenance needs.
We’ve explored what a backsplash kitchen backsplash is, its many benefits, and how to install and maintain it effctively. By avoiding common mistakes such as poor measurements, skipping wall prep, or neglcting sealing, you can ensure your backsplash remains beautiful and durable for years.
Additionally, understanding material options—from ceramic and glass to natural stone and metal—helps you select a backsplash that fits your lifestyle and budget. Incorporating creative design ideas like herringbne patterns or mosaic accents adds personality and uniqueness to your kitchen space.
Maintaining your backsplash kitchen backsplash with propr cleaning and sealing prolongs its life and keeps your kitchen looking fresh. Whether you’re a DIY enthusiast or prefer professional installtion, investing in a quality backsplash adds value to your home and transforms your kitchen into a welcoming, stylish environment.
Your backsplash kitchen backsplsh isn’t just a practicl feature—it’s an opportunity to express your style and elevate your cooking space. So take your time, plan thoughtfully, and enjoy the process of creting a kitchen you love.
Leave a Comment